For looks? For function? To give us confidence? Boost self-esteem? To enjoy hobbies? To improve health?
This brilliant commercial combines the power of fitness and with the spirit of Christmas, as an older gentleman embarks on a journey to rebuild his fitness using a kettlebell, for the ultimate purpose.
It’s an amazing message, perfect for the holidays, wrapped inside of 3 minutes.
Being a Dad, this brought tears to my eyes.
Fitness, with an end goal in mind, is extremely powerful.
Here’s simple guide on how to making bodyweight push-ups harder, and less boring.
Boredom in the gym is a tragedy because there’s SO MUCH you can do. Boredom often leads to an unraveling of discipline and in extreme cases, an eventual abandoning of physical exercise altogether.
A few of the push-up variations listed below require the use of a resistance band, a towel, and something to elevate the feet.
Other than few simple gym props, you shouldn’t need much to attack these exercises.
Push-ups are a time-tested upper body pushing pattern. They’ve played a role in building strong bodies for centuries and will continue to be one of the main components of building fit bodies for centuries to come.
Push-ups are about as resourceful they come (bodyweight-based) and ALWAYS there for you.
Some of the best workouts I’ve participated in involve little to no equipment, which is funny because I’ve invested quite a few dollars assembling a nice home gym.
Attacking progressively difficult bodyweight progressions can be a humbling experience and a lesson in how simple training can be.
At the very least, exploring new exercise variations can breathe new life into a workout regimen. It’s really easy to fall into the trap of doing the same thing over and over, and over and over.
Push up, squat, lunge, pull and core. Like a square meal, the structure of this workout is as simple as it get, yet delivers results. The only other thing I’d add is a quick jolt of cardio to finish off the workout.
But, we humans gravitate toward the fancy stuff, don’t we? 😉
Anyways, push-ups if practiced on a regular basis and with a progressive mindset, can be deadly effective for improving upper body strength and building lean muscle.
There are hundreds of bodyweight-based push-up variations. A subtle tweak here and there, a little shift of body position, and you’ve got yourself a new push-up variation.
The curated list of push-up variations below was created to give you ideas on how to upgrade your current push-up to the next level of difficulty, or, simply inject some creativity if you’ve worn out traditional variations.
All exercises demonstrated by yours truly.
If I can’t do it, I shouldn’t be sharing it.
Basic Bodyweight Push-Up
The basic bodyweight push-up is ground zero for this time-tested exercise. Get tunnel vision with push ups (off-setting with plenty of pulling exercises) and chase improvement here.
If you’re struggling to maintain form with a basic bodyweight push-up, elevate the hands onto a chair, couch or stairs. Raising the reduces the weight being pushed on each rep and makes holding body position (from hips to shoulders) easier.
Don’t be afraid to take a step back, do the exercise right, then move forward.
Feet Elevated Push-Up
It’s amazing how different an exercise feels when you change height of the hand or foot position.
Raising the feet above the hands not only changes the angle of the push, but also increases the load on each repetition.
It’s a really simple way to vary body position and increase loading, which is key to continuous progress.
Trunk Twisted Push-Up
Put yourself in a trunk twisted position with feet staggered…. and push up.
*** Be careful with the lower back here. You’ll know exactly what I’m talking about once you getting the starting position.
Band Assisted Plyo Push-Ups
Power training.
The band decreases the amount of weight you’re pushing, which means you have an opportunity to get off the floor faster.
I love this exercise for upper body power development.
Owning the “landing” phase of this exercise is key. Pay attention to landing quietly and with control.
Hands hit the floor and you’re right into the next repetition. This happens quickly.
The band assisted plyo push-up is basically plyometrics for the horizontal push pattern.
A great alternative to traditional medicine ball power training.
Slow Eccentric Push-Up
Embrace the suck.
Lowering your body super slow to the floor places emphasis on the eccentric phase of the exercise.
Try lowering down for 60 seconds. 3 sets of 5 reps will be humbling.
Do you have full ownership over the two arm eccentric variation? Great!
Do the opposite of the eccentric push up described previously.
This is a sick twist to a simple exercise.
Most people get hyper-focused on slowing down the eccentric phase of exercises, but the concentric can be slowed to create a new challenge.
Carpet Slide 1-Arm Push Ups
Grab a towel, carpet slide or dolly to perform this push-up variation.
In this clip, I’m on a sticky rubber gym floor. Because of this, nothing slides across the surface. So, adapt the exercise and lightly slide the non-working hand over the floor. TOUGH.
This is the most under-utilized push-up variation and one of my all-time favorites. I love carpet slide push-ups as a stepping stone into the world of single arm push-ups. The working arm is faced with pushing more weight, the core is introduced to a limited base of support, and it’s a right/left side exercise.
Nothing wrong with bilateral exercises (where you’re using both limbs to complete the movement equally), but moving your training toward unilateral (or right and left side only) exercises is beneficial.
This variation also serves as a great strengthener and and lead-in to low-to-ground dynamic crawling patterns.
When the arm reaches full extension and you’re at the bottom of the rep, it’s resembles theinfamous Lizard Crawl (king of crawling exercises).
Band Assisted 1-Arm Push-Ups
Anchor a resistance band overhead, wrap it around your chest and perform these assisted single arm push-ups.
The resistance band will assist your effort out of the toughest part of the exercise, the bottom of the push-up.
This is a fantastic way to introduce your body to the demands of a full single arm push up, yet decrease the load to make each repetition manageable.
Progress this exercise by using a smaller band over time. Eventually, eliminate the band and and opt for eccentric-only one arm push ups, or the full monty.
Lateral Push-Ups
Get into a deep squat, rotate and lean to one side, allowing yourself to tip into a push up. While this isn’t going to building world class strength, it’s a great variation to train pushing from a unique position.
I generally include lateral push ups into flow sequences, but they can be practiced in isolation.
High reps on these. Anywhere from 8-15 reps alternating side to side.
Push-Up Combinations
Training should include several movement woven into a sequence, or a combination. Combining exercise and working to create seamless transitions between each.
Push Up to Cross Body Knee-to-Elbow
Fitness experts love to blab about “making sure workouts having functional carry-over into the real world”, yet often forget to include combination movements that mimic real life.
Push Up + Step Through + Pistol Squat + Skater Squat
Few real life situations involve just one isolated movement pattern.
Push Up and Rolling Flow
Think about it. You’re laying on the floor. To stand up, you might perform a push-up, but then what? What’s the next move to stand up?
Push up + step through + hybrid lunge + stand and walk.
Combinations I tell you.
We can combine 2 exercises, or we can get wild and crazy and string together 3, 4 or 5+ exercises into a sequence.
Build strength using isolated exercises… but don’t be afraid to branch out and create combinations.
You found this article because you’re curious about the benefits of crawling.
Good for you!… because crawling (and ground-based movement in general) is one of the most underutilized methods in fitness. And abused.
Abused? Huh? Yes, abused.
Lots of fitness professionals are infatuated with high-intensity approaches to EVERYTHING.
Rushing bear crawls for time has its place, but it lacks the true benefits earned from slowing down a crawl pattern to build movement coordination and build skill.
Crawling is not just for babies. Adults can get pretty significant benefits from practicing crawling patterns on a regular basis.
How to progress crawling patterns beyond the basics is lesser-known, and can completely change your outlook on the activity.
I’ll talk a little more about moving beyond the basics of this article further down.
Notable benefits of crawling for adults:
Neural system development (brain-body connection to be able to do more stuff)
Improvement in coordination, learning, and behavior
Strengthen the shoulder complex
Increase proprioceptive feedback, hand strength, and dexterity
Core developer
Mobility training for the joints like hips and shoulders
Excellent transfer from the gym into real-world tasks and activities
A large majority of adults de-evolve with age.
This is a sad reality.
When we are young, we move frequently. Somewhere along the way, usually, after college ends and careers start, daily movement nose dives.
Non-exercise activity drops, which is concerning because of the undeniable data being published related to daily step count and the relationship to all-cause mortality.
Movement, and our ability to move well, is a use it or lose it situation. Wolff’s Law at it’s finest. Either keep moving or the ability to move gradually declines.
So, before you listen to that fitness pro barking out orders to plow through a 60-minute high-intensity crawling workout, please consider taking a more sensible approach.
Haven’t worked out consistently for a while? Guess what… biologically you’re different now.
Work back into slow, in manageable doses, with adequate rest and recovery separating work sets and workouts throughout the week.
Now, the positive news is that you can get back into fitness, movement, and more specific to this article, CRAWLING, right now.
Below are some AMAZING introductory drills that’ll reveal how challenging bodyweight, the floor, and a few positional shifts can be.
[FYI: Consistency with physical practice is HUGE, one of the deciding factors if you achieve goals. Not just with exercise, but with anything. You must continue to practice these exercises to earn the benefits. Fitness is not an instant gratification game… it’s the opposite. People who continually show up and put in the work, get the reward. Play the LONG GAME]
If you’re already an avid lifter or engaged in some form of exercise most days of the week, great! You’ll get plenty of benefit from these drills, and likely find them to be challenging beyond what you anticipated.
Here. We. Go.
Clear a small space. You don’t need much. A 6ft x 6ft space free of furniture and other obstructions will work.
Crawling in small spaces gets the green light from me. You can get a ton of work done inside of an imperfect space.
Reach your arms out, spin around one time. Did you touch anything? No? You’re good… let’s get to work.
Start with Non-Moving Holds
Non-moving, or static, variations are a logical place to acclimate to the demands of crawling.
The purpose of these drills is to get a feel for what a good body position feels like. Take a mental note of what you’re feeling in the arms, shoulders, chest, core, and lower body. Be in the moment, not somewhere else.
Pro-tip: Once you’ve locked in body position, imagine balancing a glass of water on your back. Don’t spill a drop. Or, place a shoe or other small object on your back for immediate feedback.
Remain still, stable, and avoid jostling as much as possible!
To start, practice holding these two positions for 3 sets of 30-40 seconds:
Limit the Base of Support from 4-Points to 3-Points
Ok, now, let’s play around with the impact of limiting the base of support does to these exercises.
Perform 3 sets of 8 shoulder taps (each arm):
During each shoulder tap, your body is doing it’s best to react and re-stabilize itself given the change of floor contacts. The loaded arm takes on the weight of the upper body, working overdrive.
Contralateral Lift Offs
Next, let’s play around with limiting the base of support from 3-points, down to 2-points of contact.
This next series of drills are TOUGH.
You’re going to lift the opposite arm and leg AT THE SAME TIME and hold that position for 10-15 seconds:
If you want, speed up the tempo. Pause and hold the 2-point position for 2-3 seconds before moving to the other side. Keep alternating for time (60 seconds) or for reps (12-15 reps).
Crawl
Set a timer and work each crawling pattern for 3 sets of 30-60 seconds PER EXERCISE.
Move slow, focused, and with control.
Keep your mind’s eye on body position and make hand/foot contacts quiet. Soft and quiet floor interactions are closely associated with control.
Crawling has been an important part of my workouts for a long time. It’s become an essential component of my warm-ups, workouts, and conditioning circuits.
If you find any of the drills above to be overwhelming, you’re not alone. To be honest, even short duration basic variations like the forward/backward crawl was soul-crushing for me in the beginning.
Anything new generally is. Your body doesn’t know how to be efficient yet. Soreness will likely follow in the days ahead.
But, adaptation is a beautiful thing. I made gradual progress from non-moving variations, to a limited base of support hold and into basic crawling patterns and beyond.
Today, I’ll engage in more aggressive crawl workouts that last anywhere from 5, 10, 15 minutes without breaks. But that didn’t happen overnight.
What’s cool about crawling is that it can be progressed far beyond the basics described in this article.
The lizard crawl is a prime example of an advanced, low position crawling pattern that’ll put your strength to the test. A 15-foot lizard crawl can feel like 50 feet.
Leveraging the principle of progressive loading and add weight to crawling exercises to further challenge your strength and coordination. Again, this doesn’t happen overnight, but it’ll give you a glimpse into where you can take this stuff.
Sometimes my workouts are purely ground-based movement sessions jam-packed with crawling and other unique movements.
Benefits and results?
Here’s what I get out of crawling work.
1. Skill transfer. Transitioning from a standing position or walking to the floor is second nature now. I don’t blink. The transition work is seamless. It’s amazing how often I use crawling in real-world situations with my kids, to complete a task or while in the woods hunting.
2. Lean muscle. Nutrition is king for body composition, but the added time under tension crawling definitely added some muscle and definition to my frame. I don’t chase aesthetics, but it’s a nice added bonus.
3. Gains in other lifts. Pushing, squatting, deadlift, etc… all felt more organized. Weight increased, volume increased (reps/sets per workout) and progress was made.
4. Fun. If you’re stuck in a workout rut, it’s time to inject something different into the mix. Doing the same thing over and over will drive you insane, and can fizzle out your interest in exercise. Mix in some crawling, it’s both challenging and refreshing.
Crawling is only the tip of the iceberg. There’s SO MUCH more to explore inside of the ground-based movement category.
Ground-based training is a fantastic supplement to traditional resistance training and mobility work.
Want to go further down the rabbit hole?
If you want to dive into more ground-based work, I don’t blame you and quite frankly I highly recommend you continue to learn about this stuff.
Check out Animal Flow or Movement20XX.
These are the premier ground-based movement training systems. Both are comprehensive platforms with subtle differences in approach.
Animal Flowintegrates different training methodologies: gymnastics, break dancing, Yoga, calisthenics, Capoeria, and various crawling and locomotion variations into movement sequences and flow.
Movement 20XXyou to use this article as a stepping to investigate comprehensive training programs like Animal Flow and Vahva Fitness Movement20XX.
I’ve shared these programs with thousands of people and the feedback has been tremendous.
Which program is the best? Tough question to answer, both are great.
Lately, I’ve been guiding people to Movement20XX. Movement20XX creator, Eero Westerberg, shares a similar approach to training as me. Naturally, my compass points toward the Movement20XX curriculum.
At the end of the day, both programs deliver amazing content that’s clearly articulated. Skill level doesn’t matter.
Beginners will get the coaching they need, and so will advanced movers who are seeking mastery and next-level gains.
Flow training challenges movement capacity and ownership and are a great addition to any workout.
Organizing 2-5 different movements into a sequence gives you a chance to focus on smooth transitions, soft ground contacts and stability throughout the effort.
Flow sequences can be up-tempo, or slow and controlled.
Slow and controlled flow training can be humbling for any fitness level, beginner to advanced.
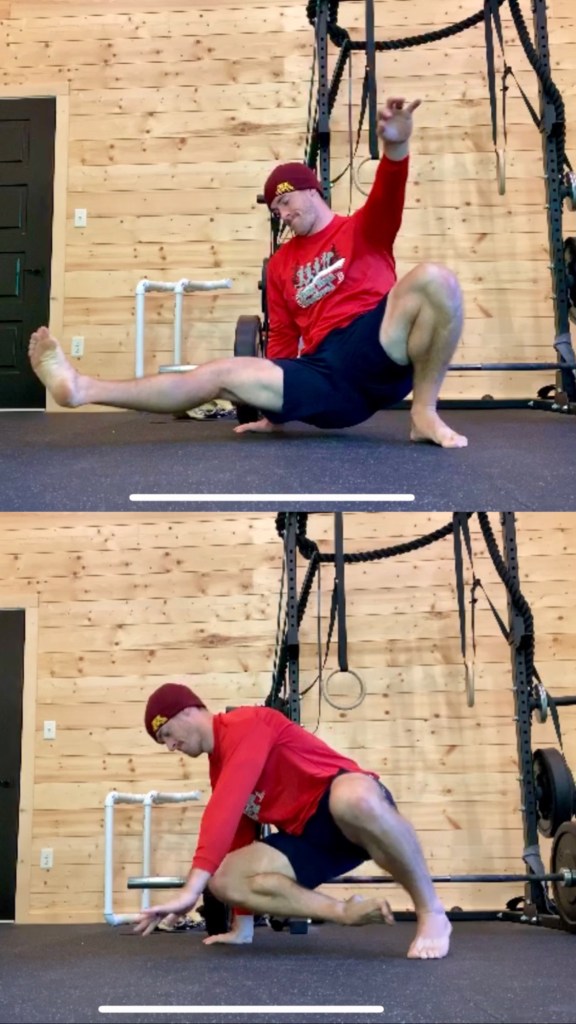
Today’s movement flow includes Cossack Squats, Kick Throughs and Static Beast. Each exercise is great in it’s own right.
The Cossack Squat is a unique squat variation. It’s a strength and hip mobility builder.
How to Perform this Flow
Lower your butt to the floor using a Cossack Squat.
What’s a Cossack Squat?
Bottoming out on the Cossack Squat (whatever depth that may be) find the floor with the same side hand.
Raise the extended leg, pulling it underneath your body as you turn into static beast.
Hold Static Beast for 5 seconds. Stay tight.
Release out of Static Beast, reversing the flow.
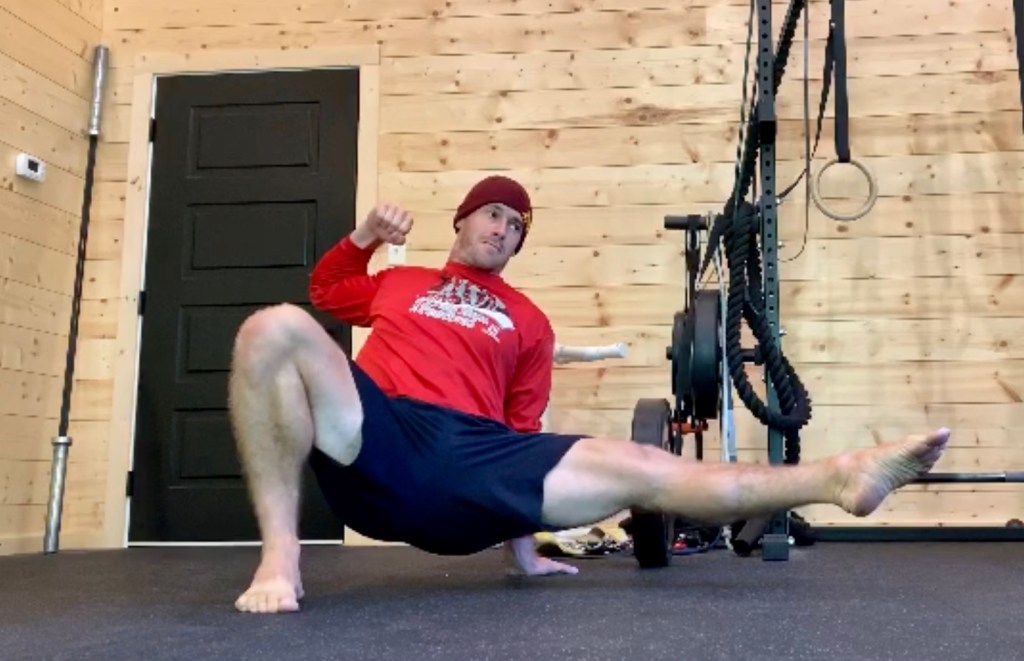
Slide the hovering leg through and out the other side where you’ll REACH and point the toes.
Extend the foot out as far as possible re the free arm pulls back in the opposite direction.
This picture should give context to the technique.
The Kick Through will be felt in the quads, hip flexors, core, up and out the opposite side shoulder.
Pulling back with the arm should resemble the draw of a bow, where the hand stops behind the ear.
Freeze the Kick Through posture and hold. This will be tough.
Re-initiate the Cossack Squat, sliding through the middle and repeating the sequence.
Quiet and Smooth Transitions
In a flow sequence, working toward quiet ground contacts and smooth transitions between exercises is the name of the game.
Quiet interactions with the floor is a good indicator of control over the movements.
With practice, ground contacts become softer as your body adapts to the demands of the movements.
Transitions are present in every day life.
We’re constantly moving from one posture, position or activity to the next.
One minute you’re lifting a heavy, awkward shaped object. The next minute you’re crawling underneath a table to play with your kids.
Static and dynamic movements show up every single day, and the in-between transitions are often overlooked.
Flow workouts are great for improving movement capacity.
conditioning the body to navigate various transitional moments, and move with greater confidence.
Where does Flow Training Fit in a Workout?
Using movement flows in pre-workout warm-ups is a great way to prime the body (and mind) before more aggressive training.
You can practice a flow for 4-5 minutes before lifting weights or performing cardio.
Flow + Resistance Training
Combining tried and true resistance training with movement flow is an effective way to maximize productivity in the gym.
Perform the exercises from top to bottom for a target number of sets.
This structure leverages non-competing exercises. Using non-competing exercises, you can move from one exercise to the next relatively quickly because different muscle groups are used for each movement. Chin-ups are an upper body effort, while squats are a lower body effort. The flow might challenge the upper and lower body, but not at an intensity that would take away from the chin-up or squat.
Non-competing exercises organized into a tri-set allows for shorter rest periods, keeping the workout moving along.
People get fixated on lifting weights, adding weight to the bar, numbers, etc.
Put these people on the floor and ask them to execute the flow sequence shared today, and they look like stiff robots.
Flow work is a perfect addition to a resistance training program.
It gives you a chance to put those gains into practice with free flowing bodyweight movements.
Flow Sequences in Circuits
Mixing and matching flow sequences with resistance exercises, ballistic movements like kettlebell swings and a little core work is a great way to create a total body movement session.
Most people would be extremely happy with their results by organizing a workout regimen to include a steady mix of:
By including each element, you’re improving joint function and tissue health, performance, building strength and useful lean muscle, movement capacity in unique positions, and overall health.
Your body will have the look you want, free of ache and pains, and the movement performance.
If you’re ready to take your workouts to the next level with quality movement training, this is the program
Here’s a challenging 5-minute kettlebell flow workout.
I’ve used kettlebell flows off and on for years.
Workouts are generally highly organized, predictable and step by step.
Kettlebell flows are the opposite.
A truly improvised flow session is unpredictable with no real agenda for using any specific exercise, and no designated reps per exercise.
You flow with whatever comes to mind, for whatever amount of time, without stopping to rest or putting the kettlebell down.
Most flow workouts are performed in the same spot, so they are space-efficient.
Keep the kettlebell moving.
Best Exercises for Kettlebell Flows
Familiarization of the exercises in a flow is essential.
Don’t make the mistake of dabbling with movements you don’t have an intimate familiarity with. I can’t think of a better way to get hurt.
When I’m setting up for a flow session, I use the following exercises the most:
Swings
Snatches
Cleans
Overhead Pressing
Around the World Slingshot
Lunges
Squats
Rows
Windmills
Swings have a ton of variations and are a mainstay in any flow session.
Fluid transitions between 2-hand swings, single-arm swings, and hand-to-hand swings keep the kettlebell moving.
All of the ballistic kettlebell exercises (swing, snatch, clean) have a rocking/pendulum-like motion that creates opportunity for quick transitions between exercises.
Ultimately, any exercise is can be used for a flow.
I just prefer quick transitions and constant movement, versus stop and starts.
Love the Flow or Hate the Flow
People either love or hate kettlebell flow workouts.
I sit somewhere in the middle and understand the love and the despise of both sides.
The problem most people have with kettlebell flow workouts the “did it for the gram” type portrayal, where the user is twirling paperweight size kettlebells.
People also tend to use kettlebell flows TOO OFTEN.
Kettlebell flows make up about 5% of my training time.
The other 95% of the time, the focus is on building strength and power,active mobility, movement capacity, and cardio.
24/7/365 kettlebell flow training often delivers mediocre results.
Training with too light of weight for too long creates little to no long-lasting improvements in performance or aesthetics.
Sure, you’ll break a sweat, but sweating doesn’t mean you’re making gains. It means you’re sweating.
I have an unbroken sweat streak going while mowing the yard on my riding lawn mower or walking for 30 minutes in 90degree heat.
Sweat is a cooling mechanism for the body.
Now, I’m not here to fully bash kettlebell flows, because the fact is I do play around with flow work throughout a training week.
Benefits of Kettlebell Flow
The benefits of a kettlebell flow training are having to improvise, change shape and adjust posture, coordinate each movement, catch, power up, move beyond accumulating fatigue, stay focused, etc.
Kettlebell flow workouts are challenging, both for the mind and body.
And honestly, flow training is FUN.
The gym is a place where people are rewarded for effort, consistency, and discipline.
But it’s also a place that can become insanely boring and monotonous.
Flow training breaks up the monotony.
A more sensible approach would be to sprinkle in a flow here and there.
After the warm-up or at the end of workout once the big stuff is completed.
Advice: Use a Heavier Kettlebell
I wrote an article about the benefits of kettlebell swings, where I touched on people making the mistake of “lifting” the kettlebell during the swing.
It’s not 100% always true, but overwhelmingly, lifting the kettlebell happens because the kettlebell isn’t heavy enough.
You can’t lift a kettlebell that’s heavy enough to train the powerful posterior chain muscles.
Try lifting a 24kg kettlebell completely horizontal up to sternum height with straight arms.
Hip action is everything with ballistic kettlebell exercises.
What does this story have to do with kettlebell flow workouts?
Pick a weight that you cannot lift with ballistic exercises like swings and cleans.
In most flow workouts, the snatch is the weakest exercise with regard to weight.
Most people can swing and clean a lot more weight compared to the snatch.
If snatches will be part of a flow, I select my kettlebell with heaviest weight I can snatch with control.
I use the same approach with kettlebell complexes.
These exercises are valuable only because of the explosive hip action needed to move the kettlebell through space.
Exceptions to Using a Heavier Kettlebell
Kettlebell exercises that cross the midline of the body are the exception to the “use a heavier kettlebell” advice.
“Lighter” kettlebells are best for cross-body movements, especially single arm cross-body variations. Control is the name of the game here.
Cast iron colliding with bone doesn’t usually end well.
My advice with cross-body exercises is to practice in isolation.
Slipping them into a flow tends to diminish the returns of the other exercises.
In general, there’s no greater waste of time than grossly underloading exercises on a regular basis.
You’ll spin your wheels in a vortex of a maintenance phase, forever.
Improved Circular Training Options
Clubbells and macebells are amazing for circular strength training.
Clubbells and macebells have a longer shaft with the bulk of weight located at the end, which creates a more torque.
[Buyer beware: Swings aren’t a miracle, don’t expect immediate results from 1-2 workouts. It doesn’t work like that.]
Total Body
The kettlebell swing works a lot of muscles on each and every rep.
Swings are a ballistic (explosive) pendulum-like exercise that hammers the hamstrings, glutes, core, forearm, and back muscles all in one shot.
To maximize power training, turn your focus on pulling the kettlebell through the legs explosively and “pop” the hips forward into an extension on every rep.
Make sure the kettlebell appropriately weighted. Swinging a kettlebell that is too light will not provide enough of a challenge for the powerful muscles of the posterior chain. Explore different weights and be sure to increase the weight when it’s necessary.
Calorie Burn and Fat Loss
I really want to avoid going overboard with the potential fat loss benefits associated with kettlebell swings.
For me, it’s not fair to label any exercise as being SUPREME to others for burning fat.
And the fact is, nutrition you talk to the nutritionists, exercise and there are too many other factors influencing the amount and speed of losing body fat.
That being said, kettlebell swings burn a significant number of calories and can make a nice contribution to fat loss.
The big takeaway, as it pertains to fat loss, is that kettlebell swings recruit a lot of muscles, and the work really adds up (calorie burn) if performed for multiple sets.
A kettlebell swing focused workout could burn up to 150 calories in 12 minutes.
Kettlebell swings burn a lot of calories because they work a large number of muscles.
In general, the more muscles working during an exercise, the larger the calorie burn of that particular exercise across time.
Thousands of people have experienced amazing aesthetic transformations (in addition to performance gains) by adding kettlebell swings to their workout.
Core Training
Kettlebell swings condition the core in a really unique way.
During each rep, the hips catapult the kettlebell up the arc of motion, while the lats pull the kettlebell back down.
A fully active kettlebell swing hammers the core muscles, particularly while pulling the kettlebell back down through the arc of motion. Actively reversing the motion at the apex of the swing hits the core muscles good.
While the kettlebell swing might not deliver the same muscle burn (mostly due to lack of time under tension) through the mid-section (like Turkish Get Ups, L-Sits, or Dragon Flags), the core muscles are getting a solid dose of stress.
Scroll up and reference the first photo in this blog post.
The core gets a workout during swings, no question.
Improve Athleticism
Kettlebell swings are amazing for training power and explosiveness.
The velocity component to kettlebell swings is a key ingredient to its effectiveness for improving power.
Kettlebell swings can improve strength, but they are probably best thought of as an enhancer of strength.
Swings serve as a supplement to strength exercises like deadlifts and squat.
Muscular endurance is the ability to produce sub-maximal muscle contractions for extended periods of time. Moderate to high rep kettlebell swings SHINE for building muscular endurance.
Other notable athletic benefits include balance and coordination.
Perfect for the Home Gym
Swings require very little space, making them PERFECT for a home gym workout.
Nobody’s home gym is a perfect space. You work with what you’ve got. And that’s fine because kettlebell swings shine in imperfect spaces.
Kettlebell swings are a front to back pendulum exercise, so the clearance needed to swing is minimal.
Reach your arms out in front, then reach your arms behind your body. If you didn’t touch anything, you’re good to perform swings in that space, no matter where it is.
Swings reign supreme for home workouts because overhead clearance is not a factor. The swing range of motion rarely rises above sternum height.
I’ve swung a kettlebell in bedrooms, living rooms, kitchens, etc.
Being able to perform swings almost anywhere decreases the likelihood of missing a workout due to environmental constraints.
Off-setting the long hours spent driving with active mobility trainingand a quality swing workout can unwind time spent sitting.
Normally, people rely on bodyweight exercise or running while traveling.
The kettlebell can add a new dimension to the usual travel workout.
Kettlebell swings integrate really well with bodyweight or suspension trainer exercise and can boost the training effect.
Or, make a workout by combining swings with other time-tested exercises like presses, rows, squats, snatches, cleans, lunges, or Turkish Get Ups.
Note: Kettlebells aren’t ideal for air travel because of weight and having to lug it around the airport.
Listen to Joe Da Sena talk about this travel habits with his 20kg kettlebell on the Joe Rogan Experience Podcast.
Low-Impact
Kettlebell swings are a low-impact exercise that can deliver a potent cardiovascular training effect similar to running, according to this study.
The subjects in the study swung extremely light kettlebells (in my opinion) and were still able to generate an aerobic training effect comparable to running.
Low impact activities that have a high energy cost/metabolic demand can be great for a lot of people.
Simple to Learn
For benefits, kettlebell swings are easy to learn.
Hike and Hinge
Hike the kettlebell between the legs, hinge and load the hips, shoulders stay higher than the hips.
2. Root
Pull the kettlebell through legs from the back to the front of the body, “root” the feet firmly to the ground as the bell arcs upward.
3. Float
Float the kettlebell as it reaches the apex of the swing.
Common Mistakes:
Avoid “lifting” the kettlebell or squatting the kettlebell.
The best way to avoid lifting the kettlebell is to choose a weight you cannot lift. People can muscle up lighter weight. When the kettlebell is too heavy for muscling, you’re forced to power it up with hip action.
Avoid squatting by practicing the kettlebell deadlift, which has very similar mechanics to the swing.
The swing is a hip hinge, not a squat.
Kettlebell Swing Variations
Kettlebell swings have a number of awesome variations to keep workouts fresh and challenging.
The three most common swing variations are:
2-hand swing
The exercises above are ranked in order of learning importance. Always start and train the 2-hand swing hard.
Once you’re acclimated to the basic three, explore other swing variations.
Hybrid swing variations:
Dynamic Forward and Lateral Single Arm Swings
Single Arm Swing and Catch
Staggered Stance Single Arm Swings
Band Resisted Swings Traveling Swings
Outside-the-Knee Swings
Side-to-Side Swings
The staggered stance single-arm swings are a personal favorite.
Shift body weight to the opposite leg for a more aggressive loading stimulus on each rep and the rotational component of this swing variation is evident.
With a few different weight kettlebells, switching up the swing variations throughout the workout becomes a refreshing approach and a great way to train.
Creating Workouts with Kettlebell Swings
Creating a workout that includes kettlebell swings is simple.
Kettlebell swings can be performed in an isolated fashion without any other exercises or can be paired with other movements to create a 2-3 exercise circuit, building up to a complex style workoutwhere 6-8 exercises are performed.
Kettlebell ONLY Workout
Grab a kettlebell and swing it for 10 reps.
After the 10th rep, stand over the kettlebell, don’t move.
This can serve as a workout finisher or as the workout. Don’t let the simplicity fool you.
Kettlebell Circuits
Kettlebell swings don’t have to be THE ONLY exercise in the workout.
You can increase a workout’s impact by adding other exercises to make a circuit.
Example:
1a) Clean to Overhead Press
2a) Goblet Squat
3a) Bent Over Rows
4a) Push-Ups
5a) Kettlebell Swings
Amplify the Training Effect Using Cardio Machines
Mixing kettlebell swings with other equipment, cardio machines, bodyweight or accessory lifts is a great way to amplify the training effect of the workout.
Most of these workouts are metabolic resistance training workouts.
Low-impact workout:
1a) Row, SkiErg or Airbike x 1-minute effort
2a) 15 Kettlebell Swings
3a) 15 Bodyweight Push-Ups
Rest for 60-75 seconds, repeat for 6-8 rounds.
Kettlebells (not just kettlebell swings) pair well with cardio machines.
Several days per week, I put in 60+ minutes of steady-state cardio on the air bike.
During the workout, I like to break up the monotony of riding with kettlebell swings and/or hip thrusts.
Performing kettlebell swings saves your ass from falling asleep on the bike, puts you back in the standing position while delivering a potent training stimulus to the posterior chain.
Finish the swings and start riding again.
SkiErg
SkiErg is anterior dominant and kettlebell swings are posterior dominant. Combining the two creates a non-competing, total-body training session.
I love alternating between 8-10 heavy kettlebell swings and 100m-150m SkiErg sprints, for 10 total sets
This power-endurance type training delivers a punch with explosive efforts, cardio and calorie burn using a simple and effective workout.
If rowing, I do my best to accumulate at least 2000 meters in the session.
8 x 250m = 2000 meters.
My Results Using Kettlebell Swings
The key is consistency (swinging several days per week), respecting progressive loading (can’t swing the same weight forever and expect different results) mixing in other swing variations to challenge rotation, stability, and balance.
The style of the swing matters.
Adjustments can be made to kettlebell swings to elicit varying different training responses.
The weight and reps per set can dramatically change the style of the swing.
High(er) rep kettlebell swing work set is going to look and feel a little different because, at 20+ reps, we’re now dealing with muscular endurance and conditioning.
Low rep efforts are best for power training. Each rep is maximum effort. The goal with low rep kettlebell swings is NOT cardio, it’s explosiveness and power.
High rep swings have diminishing returns for improving power, but can be great for improving conditioning.
Each swing style has its own advantages and benefits. It’s all about what you’re hoping to achieve from your training.
Swings remain my go-to exercise for getting sh*t done.
In my experience, most people are going to notice the most significant improvements from dedicated mobility training in the hip and shoulder region.
Getting the shoulders and hips working nice, pain-free, strong, and supple is a good goal for ANYONE.
And I know saying that sounds really broad, but a body that works nicely without pain during movement is ideal.
Today’s post shares 3 hip mobility exercises that can wake up your hips and make them feel great.
I preach to play the long game with fitness. Whether you’re pursuing a body transformation, performance gains, or general health improvement, it’s going to take time.
Nothing long-lasting happens overnight with fitness and movement.
It’s a process.
But after “blowing the dust” off of your hip musculature with a few good work sets of active mobility work, your hips will likely feel amazing.
“Amazing” = buttery, mobile, alive, awake, workable, etc.
The basic premise of active mobility training is to increase range of motion (progressively) and establish full CONTROL over that range of motion.
We accomplish this using a variety of isometric holds and dynamic movements.
Conditioning the hips, a ball-and-socket joint with a really robust potential for movement in many directions, to perform tasks beyond lifts like deadlifts, squats, and lunges is ESSENTIAL.
Deadlifts, squats, and lunges are all great exercises to include in a workout regimen.
No question.
My YouTube channel is loaded with variations of each of those movement patterns.
But, from a joint articulation perspective, these exercises only scratch the surface.
Your hips can do more. Way more. Mobility training can help retrain your body to access this movement.
Don’t interpret my message as a call to stop lifting weights. but rather an encouragement to deliver nourishment to your joints in the form of active mobility training.
Dedicated mobility training can help mitigate injury while boosting movement performance.
Building strong hips is can be made simple, and these 3 hip strengthening exercises will help to improve your hip control and strength.
90/90 Knee to Heel
Touch the knee to the heel.
Position the hands in front and outside the lead leg, using your arms to prevent any contorting of the body.
While moving the leg, hover the knee an inch or two above the floor while the foot lightly glides. Keep the floor pressure as soft as possible.
After touching the knee to the heel, drive the leg away from the heel as far back as possible.
Squeeze the glute hard and PUSH!
Keep the torso calm throughout the drill.
Aim for 3-5 sets of 10-15 reps per side.
90/90 Heel to Heel
Same idea here, except right before the knee touches the heel, articulate the hip and lift the knee upward.
Guide the trailing foot heel to contact the down leg heel.
Some people might refer to this as a “heel click”.
Call it whatever pleases you, just make sure you try it.
Lightly touch heels without losing body position before reversing the range of motion and reaching back.
On the reach back, SQUEEZE your ass cheek HARD. REACH!!!
Aim for 3-5 sets of 10-15 reps per side.
90/90 Around the World
I wasn’t sure how to name this movement, “around the world” seemed fitting.
Perform the same knee to the heel, upward lift into the heel to heel, but return to the leg to the start position by extending at the knee and swooping the leg back into extension (with a subtle rotational articulation).
All of the hip mobility shared will burn up the muscles to some degree, but this exercise will really set them ablaze.
Again, do your best to keep the upper body calm. Avoid excessive leaning or other compensations.
Stay strict, make the hips do the work.
Aim for 3-5 sets of 8-10 reps per side.
How to Make These Hip Mobility Exercises Harder
Slow down and increase the time under tension.
Test your ownership over the movement by moving slower. Try moving at a 3-count or 5-count pace. Add pauses when you find weak points and GRIND!
Add ankle weights.
Wearing 2-5lb ankle weights load will make each of these hip mobility variations significantly more difficult.
Especially on the 90/90 “around the world” variation. Your face will begin to melt onto your neck.
A 5lb ankle weight will feel like 25lbs when your leg is at full extension. 🔥
A simple pair of ankle weights serve a valuable purpose with mobility training, and if you didn’t find the bodyweight variations difficult, take a shot of whiskey because adding weight is going to increase the intensity quickly.
Consistently practicing active mobility drills helped me make gains with my lifts.
I fought the idea for years and talk about it frequently on this blog and in the description section of my YouTube videos.
I couldn’t touch the dragon squats for months. It got to a point where I wasn’t even sure my bony structure would allow me to perform a full range dragon squat. Ha. Regressions provided limited improvements.
My hips didn’t understand they could move into those “extreme” ranges without compromising safety. Our bodies are equipped with amazing safety features.
So I turned my attention to ramping up the mobility work (along with dragon squat regressions), and whammo… depth achieved.
From a usefulness perspective, video CRUSHES the written word.
I could write 800 words about an exercise, or show you a :30 second video and deliver more clarity.
I hope you view each video below and think, “Shit, that exercise looks fun/effective/challenging/engaging/different or applicable to my situation, I’ll try that next workout”.
Exposure to new ideas can change your attitude and enthusiasm about working out.
I used yoga blocks for the upper body Yoga Block Game in the video below, you don’t have to.
Use what you’ve got lying around the house (yoga blocks are extremely versatile, inexpensive and have a lot of uses).
Weight. Any object of weight will work to load these exercises. Common household items can be substituted in place of dumbbell or kettlebell. Use what you’ve got. If the weight is challenges the movement pattern without compromising safety, go for it.
In the meantime, look into getting yourself an adjustable kettlebell or dumbbell (adjustable fitness equipment are economical and space savers)
Quick Advice on Reps/Sets/Weight
Let’s address the two most common questions I get about most of my exercise videos:
“How many reps and sets do you recommend?
“What weight should I use?”
Good questions… but here’s the deal, only you know the answers to those questions.
I can suggest reps all day long.
But if you’re cheating the exercise on rep 3 of a 10 rep set because your ego wants to practice the exercise variation from my video, but what you really need is a variation 2-3 steps back in difficulty… well…
Same goes for weight selection.
Avoid the temptation to chase the “burn” during each work set and select a weight you can control every step of the way.
The Goldilock’s Rule for selecting weight:
Not too heavy, not too light… juuuuusssssstt right.
Take a step back and take an honest assessment of your strength and fitness level, movement quality, and familiarity with the exercise(s).
Ego-Free Guidelines to Apply to any exercise:
Start with lighter weight (move up in weight as needed)
Quality reps only
Get to know fatigue and what it doesn’t to movement quality
Move slow, move with control
Patience
Be in the moment, feel everything, remain mindful
Enough lead in.
Here are a 4 (home gym approved) exercises and a movement game worth experimenting with in your next workout.
Split Stance Cross Body RDL
Have you ever had to lift an object from the floor without being able to get into a picture-perfect deadlift stance/position?
Me too.
Stagger your stance and shift weight onto the front leg.
Lower the weight (kettlebell, dumbbell, etc) along the outside of the front shin bone until it touches the floor outside of the foot.
Pause briefly. Stand back up.
You should feel the bulk of the work from the front working leg hamstring up into the glute.
Slipping a little rotation into common movement patterns (hip hinge) is a good thing. (So is rain to make whiskey).
Aim for 3-5 sets of 6-8 reps per side.
Single-Leg Deadlift + Row
Coordination, balance, and timing are all put to the test with this exercise.
Grab the weight, hinge forward while balancing on one leg, row.
People get pleasure from bashing combinations like this because neither the deadlift or the row is “optimized”.
Interestingly, the same folks who poo-poo these exercises struggle to balance on one leg, sooooo….?
The purpose of this exercise is to be a movement challenge.
Balance on one leg, maintain shape and control while rowing an object of weight.
For perspective, this exercise variation isn’t my top pick to deadlift 500lbs from the floor. There are better variations.
Also for perspective, performing a row with a challenge amount of weight while holding a single leg hip hinge is a difficult little maneuver.
And how about the foot conditioning here?
Balancing on one leg is fantastic for strengthening the tiny little muscles underneath and surrounding the foot/ankle.
If you can, remove your shoes while you workout. Barefoot training is a really simple way to strengthen the feet.
Hybrid/non-traditional movements like this one offer up something different for your body unpack and navigate, which IS the benefit in and of itself.
Aim for 3-5 sets of 6-8 reps per side.
Yoga Block Game (Upper Body)
Objective: Push each yoga block out as far as possible.
I suggest going around the circle a few times because you’ll notice you’re able to push each block a few millimeters further on each attempt.
From my experience, when a normal linear set of an exercise transitions into a task or a challenge, people get competitive and the effort given increases.
The entire front side of your body is going to be burning like a bonfire on this one.
Arms, chest, core, etc. All of it… on 🔥
Aim for 2-3 attempts, either during the warm-up or workout.
Hollow Body Rock + Single Leg Squat
Hollow Body Rocks and Single Leg Squats (aka pistol squats) are two fantastic exercises on their own.
Single leg squats are my go-to squat pattern. I get a phenomenal training effect without needing a lot of equipment (for added weight) and there are bunch of progressive variations to further challenge mobility (ex: dragon squats).
Single leg squats transition well into everyday tasks. So much is done on one leg, it’s beneficial to train for it in the gym.
Hollow Body exercise variations link the upper and lower body together and might look easy from afar, but they‘re actually quite difficult.
As an introduction to Hollow Body work, try holding a Static Hollow Body position for 30 seconds x 4-5 rounds (1:1 work to rest periods).
Good luck. 👍🏼
Fusing Hollow Body Rocks and Single Leg Squats creates a whole new movement challenge.
The goal here is to make two exercises look like one exercise by creating smooth transitions.
Aim for 5 sets of 6 reps per leg.
Isolated Exercises into Movement Combinations
If you’ve checked out my YouTube or Instagram pages, you’ll notice how often I fuse 2, 3 or maybe 4 exercise together to create movement sequences and hybrid movements.
You can take simplest of exercises and morph them into a difficult movement combinations.
Always start by learning a movement pattern in isolation.
Give your body a chance to understand the exercise.
Your body will gradually make gains in strength, control and work capacity.
From there, explore fusing several exercises together, creating combinations, etc.
Down the road, play around with speeding up the tempo, change angles, twist/turn, change levels, use different training surfaces, add weight, etc.
Exercises like this is can provide a simple introduction to movement training and create a renewed interest in gym work.
Which exercises are you going to try out today?
Any of them? All of them?
Give them a try and leave me a comment down below.
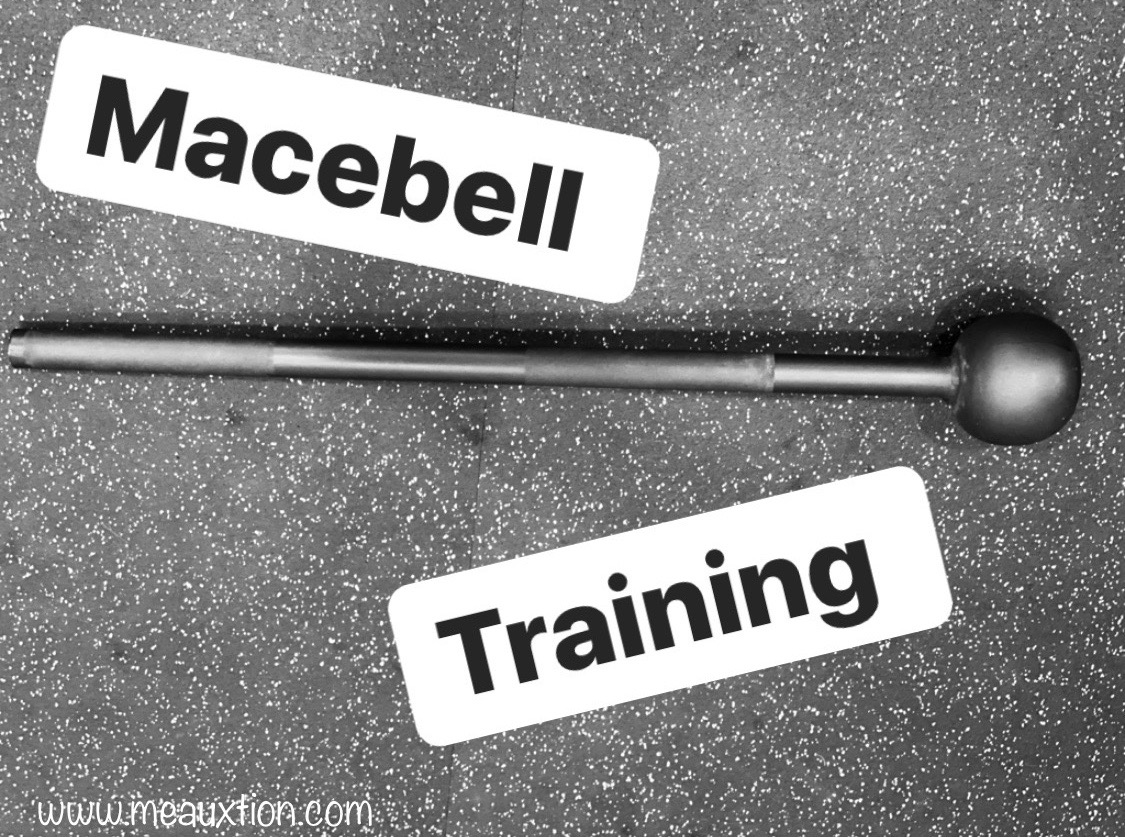
Macebell training provides a unique variety of exercise options mainly because the macebell has a weight distribution, shape, and design different than any other piece of fitness equipment.
The exercises a person can integrate into their workout regimen using a macebell are unlike anything else.
Every piece of gym equipment is a tool with different applications and uses.
The macebell, being a non-traditional piece of equipment for the modern gym, creates an opportunity to explore unique movement patterns.
360s and 10-and-2 are fairly recognizable circular/swinging exercises popular on social media, touted improving shoulder mobility and core stability.
I can’t disagree, but macebell training can go a lot deeper than just two exercises.
The macebell can be repurposed and morphed into a tool to challenge very dynamic rotational movements that include footwork.
The landmine-like exercise in the video above was tough, even with a 25lb mace. Keep the arms extended at the elbows and reach as far out as possible. Breathe.
Torque and Velocity
Macebells create a fantastic opportunity to train in planes with torque and velocities that other common gym equipment simply cannot.
Each of these movements presents a different challenge.
Enjoy.
Gravediggers
Gravediggers mimick the motion of shoveling and work great as a warm-up drill or for conditioning.
Play around with hand position on the shaft of the macebell.
Moving the hands closer together can make a 15lb macebell feel like 30lbs.
Add a twist at the top of the Gravedigger, rotating from the waist to the shoulders.
Flowing movements like this can be performed for higher repetitions, anywhere from 8-15 reps per side, for multiple sets.
Gravedigger + Push-Up Flow
A gravedigger, except keep moving forward, setting the mace down softly for a push-up.
Back and forth you go.
Squat to Press
Squat down while raise the mace up.
Looks easy, but it’s not easy.
Stationary High/Low 360s
Alternating high and low 360s is one of my all-time favorite combinations.
The flow of this combinationon is addicting and the rotational aspect is very unique.
Be very, very, very aware of where the mace is positioned on the low swing.
If you bounce the head of the mace off of your feet or shins, it’s all over.
Even with lighter weight, you’re heading to the emergency room.
To help avoid this catastrophy, choke up higher on the mace, which basically turns the mace into a club (it’s shorter family member).
You’ll be able to relax your mind and find a rhythm.
Cross-Body Bicep Curls
Bicep curls using a macebell are freaking aggressive.
First, you’ve got navigate absorbing the force of the macebell traveling with speed through the middle (while switching hand position on the shaft of the mace).
Hit the brakes, slow it down.
Lower the arm into full extension, “throw” it back through the middle.
I love this hybrid bicep curl.
It’s a lot more engaging compared to a boring traditional bicep curl.
360 + Bicep Curl Combo
Linking the traditional macebell 360 exercise with the previous mentioned cross-body bicep curl creates a very approachable combination.
Core, shoulder mobility, biceps, force generation and absorption, etc.
It’s all here.
Rotational Skaters
Incorporating a little footwork with rotational movement brings us closer to the dynamic demands of sport and daily life.
This is a tough drill.
Firmly palm and grip the mass of the macebell while driving the hands inward toward each other to secure the macebell.
“Skate” and rip the macebell through the middle.
Get aggressive with rotary compoent, but remember you’ve got keep enough control to push and stick the landing.
Go with lighter weight. The video shows 15lbs.
Adex Adjustable Clubs and Maces
It’s nice to have a few different macebell weights on hand for different exercises.
For example, the macebell I’m going to condition with using 360s is WAY heavier than what I’m going to drill rotational skaters with.
The problem is buying a bunch of one-piece macebells is it gets expensive and will clutter up a gym space pretty quickly.
Keep the gym space as open as possible is best (in my opinion).
With the purchase of an Adex Adjustable Macebell you’ll be able to quickly adjust the weight ranging from 6-30lbs in increments depending on your strength/skill level, along with the exercise.
Remember, some exercises will require lighter (or heavier) weight.
Need to go heavier?
The Rhino add-on kit increases the club weight options to 45lbs and macebells to 50lbs respectively.
Above 50lbs and you’re going to be buying a custom macebell from somewhere.
There are hundreds of different movement combinations, circuits, and workouts that can be created using a single kettlebell.
I actually prefer to workout with one kettlebell.
Single kettlebell training allows for smooth hand-to-hand switches but also employs uni-lateral loading, which challenges the muscles on the non-working side to stabilize the body.
Pound for pound, the king of all unilaterally loaded exercises is the Turkish Get Up.
The training effect will be profound and significant.
Each exercise listed has suggested reps for that particular exercise.
If your kettlebell is on the lighter side, which it might be, simple adjustments can be made to…
… make lightweight feel heavier…
Reducing or eliminating rest periods
Slowing down the speed/tempo of exercises (check out this super slow push up)
Adding reps to each exercise
In short, you can add reps, reduce, or fully eliminate rest periods or slow down the tempo of exercises to spend more time under tension.
All of these options will increase the intensity of the work being performed.
Note: Some exercises are impossible to slow down.
Swings, cleans, snatches are ballistic movements that need to be performed with explosiveness.
Lunges, squats, deadlifts, core work, pressing, etc… can benefit from a slow tempo.
Perfect for the Home Workouts
Kettlebell and bodyweight exercises are PERFECT for home workouts.
Each workout below was created for people who are exercising at home.
I’ve been training exclusively out of my home for over 12 years, and I’ll never go back. Learning about how to structure workouts at home can take some time, but once you get into a groove it’s really hard to return to the gym.
Time and money savings are two HUGE reasons to exercise at home.
If you have a gym membership, including a home-based workout 1-2 days per week can save time and help accelerate your pursuit of fitness goals.
Warming Up
Each workout should include mobility work for joint hygiene and function.
Improving joint range of motion is a complete game-changer.
Basic mobility drills are powerful for relieving nagging aches and pains and restoring function.
A lot of mobility drills are bodyweight-based, so if you’re without much equipment you can still practice these and get all of the benefits.
Pretty cool.
You came here for workouts, and workouts you’ll get.