Carpet Slide Push-Ups (with reach)

How-To, Motion

A pair of carpet slides is an essential tool for every home gym.

Carpet slides add a new training dimension to a boat load of exercises. Slides can be used with exercises like reverse lunges, lateral lunges, crawling drills, hamstring curls, core work, and in this particular case, push-ups.

Probably best of all, they’re incredibly economical at $2-$7 for a pack of 3-4 sliders.  How?  The carpet slides marketed for fitness purposes are dangerously close in design and functionality to the furniture sliders available at your local home improvement store.

In the past, carpet slides have received the most attention when incorporated with lower body training.  Think hamstring curls and reverse lunges.

But carpet slides are extremely useful for upper body training also.  Using slides to introduce new variations of push-ups can be refreshing, and brutally challenging.

Carpet slide push-up variations are amazingly challenging.  Not everyone is ready for the coveted single arm push-up, and for those of you that are, maybe you’re looking for a new variation.  Something you can integrate into a work capacity circuit or load up with a weight vest and grind it out.

This is it.

Progression-wise, the carpet slide push-up w/ reach exists somewhere between a traditional two-arm push-up and full-blown single arm push-ups.

Some (not all) of the load is from the moving hand does take on some loading during the exercise, although this can be limited by the exercisee.

Exercise Technique…


screen-shot-2017-01-21-at-8-17-59-am

  •  Begin in the top position of a push-up, hands centered on top of the sliders.
  •  Slowly lower yourself to the floor, hugging sliding the non-working arm out in front of your body.
  •  Keep the elbow of the working arm pulled into side body
  •  Pause briefly at the bottom, working elbow at 90 degrees.
  •  Press up and repeat on the other side, alternate for scheduled reps.

Workout Integration…

  •  Rep range:  6-12 reps per side with bodyweight, beyond than add more weight.
  •  Load:  Bodyweight until 12 reps are achieved, then add weight.
  •  Sets:  This depends on goals, 3-5 sets is plenty.
  •  Tempo:  Slow it down on the descent to the bottom, 3-5 seconds on the way down.
  •  Technique break down = rest

Where does this exercise belong?

The strategy of building fitness progressively from the ground up is awesome.  Your current fitness level and past training experience will determine how and where you place this exercise into a workout.

For some, this will be a strength training drill, you’ll need adequate rest after the set.  3 simple sets of 6-8 reps will leave you drained.  That is fine.  Beat on it for a few weeks, aim for improvement.  Expect to be sore through the chest and tender around the obliques in the coming days.

For others, the carpet slide push-up will provide a delightfully saucy challenge in a short burst metabolic training session.  I’ve worked it into a long circuit or kept it simple as part of a 3-exercise burner.

Here’s an example of where this exercise could live within a total body workout:

Alternating Split Squat Jumps x 8 each side

***Carpet Slide Push-Up (with forward reach) x 8 each side***

Airsquats x20 or Goblet Squats x8 (load up here)

Suspension Trainer Inverted Row x10 or 1-Arm Bent Rows x 8 each side

Own the exercise from top to bottom to top…

I have to admit I’ve seen several YouTube videos of carpet slide push-ups.  85-90% of the people in the videos are dropping into the bottom of the push-up too quickly.  More like falling into it.

Address the concept of OWNING the eccentric descent in this exercise.  Pause at the bottom, stay tighter than a pair of skinny jeans, contract and push up and out of it.

Again, slooooooowwww down, spend more time under tension and focus on remaining as rigid as possible.

At most, the descent into the bottom of the push-up should take 1-2 seconds, with NO bounce out of the bottom.  Pause at the bottom, hang out there.  Press out.  Strict.

Core training?  This is core training…

Without sounding like a physique zealot, because I’m not, this exercise provides an unbelievable stimulus to the core.  All without any bells and whistles, just basic rigid body position, technique, and gravity.

You won’t be able to execute as full extension carpet slide push-up without activating the torso aggressively.  It’s self-limiting.

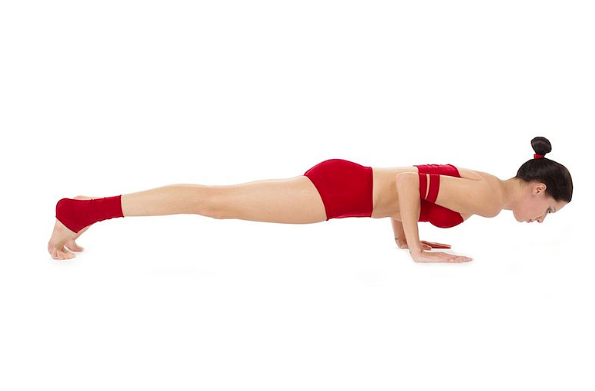
To help make my point on how much core is involved with an exercise like this, drop down into a push-up position, raise one arm forward in full extension, while the other supports the body.

Stay in this position for time.  Just remain in that position without changing posture.

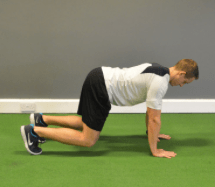
Too easy?  Inch the feet closer to together, narrow the base of support.  Any exercise can be made harder.

The challenge to the core during the carpet slide push-up with reach will be intense, felt from the hip flexors, through the torso, up to the collar-bone.

There will be a tremendous anti-rotation stimulus while supporting the body with one arm. Think about it for a second… the other half of the body wants to sag toward the floor (damn you gravity). Even with the sliding arm providing some assistance, your core will be lit up.

Maintaining a rigid body from head-to-heel is a must. Stay straight. Creating rigidity will require adequate tension through the mid-section.

Progression: Make it harder…

To increase the challenge, gradually lighten the hand contact of the sliding arm, which will lessen the amount of assistance from the sliding arm while increasing the load of the working arm.  Removing assistance from the sliding arm also drastically increases the amount anti-rotation stress as the exercise inches closer to a true single arm push-up.

Increasing the difficulty can be accomplished several ways, but the most honest approach would be to lessen the contact to just the fingertips.  Start with all five fingertips, progress to three fingers, two-fingers (thumb and pointer)… etc.

Before you know it, you’ll need a weight vest, at which point you’ll begin from the bottom rung of the progression once again, with palm firmly on the carpet slide.

Regression:  Make it easier…

To decrease the challenge, wrap a band around your torso and anchor the band to a point directly overhead.  The band will assist you during the hardest point of the exercise when you’ll need help the most.  For most, the hardest point will be the bottom of the push-up.

No carpet?  

Carpet slides work on hard surfaces also.  I’ve used them on hardwood and cement floors with great success.  Of course, this will limit the lifespan of the carpet slides, so if you’re going this route, purchase cheap slides at your local home improvement store.  A pack of carpet slides at Menard’s near me costs $2.99.  Cheap.

A suspension training set to the lowest possible height (without making contact with the floor) will also work.

The other option tools like the Ab DollyHAVYK Sliders, or a more budget friendly option like Core Coasters.  All have wheels which make them ideal tools for hard surfaces.  These options cost significantly more than the carpet slides, but you’ll find a plethora of uses for each, making them a worthy investment.

Early in the article, I suggestioned using furniture slides as a viable alternative to carpet slides designed for fitness.  There is a slight difference in my experience, being that fitness specific carpet slides typically have a much better integrity.  The manufacturers know that these are going to be used frequently, the design is more durable.

Here are some fitness carpet slides on Amazon.

No equipment at all?

Worst case scenario, I’ve done these push-ups without any tools period.  Doing so requires minimal weight on the sliding hand, but it works just the same.

User beware, going this route is intense.  There’s going to be way more friction on the floor  without a slide.  This is ok, just be aware that it might be too aggressive.

The end…

That’s all folks.  I’ve written too much already, way too much.

Give this baby a try.  Mix it in wherever you see fit.  Ask questions as you have them.


Kyle


Workout Finisher: Kettlebell Swings + Ascending Burpees

10 minute Workouts

Today’s workout finisher is retro-style, but remains one of the most difficult finishers I’ve ever come across.  If I recall correctly, this finisher could be one of the first end-of-the-workout challenges I ever attempted, back when the only equipment I owned was a couple of kettlebells.

It’s a potent mixture of two exercises:  kettlebell swings and burpees.  

Burpees have been making headlines frequently over the last 5 years or so, and for good reason.  A well executed set of burpees can pure magic for conditioning, fat loss or entrance to heaven.

Here are the details of the workout finisher:

Equipment needed: kettlebell (sub-max weight that can be swung for 15+ reps)
Time required: 8 minutes or less
Exercises: 2 (kettlebell swings, burpees)
Rest: None (continuous work until finished, rest as needed to maintain technique)
Total Rounds/Reps: 10 rounds/ 100 kettlebell swings, 55 burpees

screen-shot-2017-01-08-at-10-35-21-am

*** Note:  The workout is finish after round 10, which will have you doing 10 kettlebell swings and 10 burpees.  The above snapshot misleads a bit, only showing 5 rounds and burpees up to 5 repetitions.  The end point is 10 rounds.

For kettlebell weight, choose something you can swing for 15 reps with ease.  For males, 24 kg (53lb) will feel light in the beginning and torturous toward the end.  For females, 16kg (35lbs) may feel the same.

Feel free to keep a lighter kettlebell nearby if you need to decrease weight.  There is no shame in dropping down in weight if you need to.

This workout finisher will leave you gasping, and also degrade your kettlebell swing technique faster than hell.  When swinging a kettlebell while under high fatigue, you must proceed with caution.  It is your duty to monitor your technique during this challenge.

To train smart, rest when you feel fatigue start to overpower technique.  Just like any other exercise, it’s possible to predict when the next swing is going to be below average.  You can sense the slop coming from rep to rep.  The reaction time is decreased, but you can feel it.

Below average technique with kettlebell swings can wreck your body.

I’m an advocate for pushing the limits against fatigue, with boundaries.  Fatigue is a well-known exercise technique killer.  A body exerting in sub-par positions can result in injury.

Personally, I advocate shutting down the work-set until energy is restored.  Some people will not agree.

My guide is a simple question:  Is resting 30 seconds worth saving yourself from exercise related back or shoulder surgery?

For me, it is.  For you, it may not be.  Know thyself.

Cautions given, get after this workout finisher and let me know how you did.


KG


Workout Finisher: 250-meter Row + Burpee + Overhead Slams

10 minute Workouts, Workout Finisher

I whipped up this potent workout finisher to end my training session on a high note yesterday, and it turned out to be fantastic.  Workout finishers provide a fresh take on traditional cardio training without the nauseating time commitment (aerobic) and a nudge to burn body fat.

Prior to the workout finisher, I had spent roughly 30 minutes time pounding away on some controlled strength training:  single-leg deadlifts, unsupported pistol squats, kettlebell over-head presses and weighted inverted rows.

Leading up to the workout finisher, it was these 4 simple strength exercises to address everything:  upper body push, lower body hinge/pull, upper body pull, lower body push.

Since tweaking my back, I’ve made a dedicated (and difficult) effort to address core control and rebuild my hips, which is why I’ve been hammering away on slow, controlled strength training.

Admittedly, it is difficult to ween off of the metabolic style training sessions and into strict reps coupled with even more strict rest periods.  It’s probably how a NASCAR driver feels driving 30mph around town in a Prius after hardcore racing at the Daytona 500.

To be honest, I had no intention to include anything more than my strength training.  My last set of pistol squats found me wanting a challenge, so why the hell not?

Here are the details of this workout finisher…

  • Equipment needed: slam ballrowing machine
  • Time required:  10 minutes or less
  • Exercises:  2 (“burpee + over head slams” are counted as one exercise)
  • Rest:  None (continuous work until finished, rest as needed for technique)
  • Total Rounds:  4 

screen-shot-2017-01-05-at-7-05-25-am

What?! That’s it?!

Yes, keep it simple here.  Cycle back and forth between the 250-meter row and burpee+over head slams for a total of 4 rounds.  Do not stop until you’re finished.

Each burpee will be completed as a 3/4 burpee, with no push-up at the bottom.  Adding the push-up would disrupt the flow because the slam ball would be positioned too far in front of the feet.

Instead, you’ll lower your hands to the floor, kick the feet back into the top of the push-up position, then quickly snap the legs back underneath to the bent knee athletic position (similar to the start position of a deadlift).  From this position you’ll lift the slam ball from  the floor to a fully extended overhead position and slam.

Again picking the slam ball off of the floor, do so with the same technique that you’d use to deadlift or clean a barbell.  Keep the slam ball close to your body on the way up.

In all, you’ll be rowing 1000 meters and completing 40 burpees and 40 slams.

Unplanned efforts have their place.  Not everything in a workout, or in life, needs to be by the planned and by the book.  Breaking free, going for it when your body has the energy to do so is liberating.

Planned for 8 reps but able to get 10 reps?  Go for it.  Cardio not originally part of the day’s workout?  Go for it.  Not scheduled to workout today but feeling awesome?  Go for it.

Know thyself.


Give this workout finisher try, let me know what you think…


Kyle


Air Bike Workouts| 5-Mile Ride for Time

Airbike Workouts

Assault Air Bike

The air bike is a low-impact, low learning curve, low-risk of injury, high reward cardio machine that’s perfectly designed for high-intensity workouts.  

Air bike training is super effective for improving cardio, without all of the ground impact forces.  

On an air bike, the harder you pedal, the more difficult it becomes.  

Air bikes work the upper and lower body.  The upper body works the dual-action arms, while the lower body pedals.   

This article is all about a middle-distance air bike workout, the 5-mile ride for time. 

The 5-mile ride for time is a SOUL-CRUSHING aerobic threshold challenge.

Most people will finish the ride in 15 minutes or less, making this ride extremely time-efficient.

Air Bikes

One of the best features of air bike training is the learning curve.  

There isn’t a learning curve.  

There’s very little skill required to peddle a stationary bike.  

Get on and go.

I wrote a more comprehensive article on air bikes here.

There’s a significant amount of mental conditioning involved with air bike training at higher intensities.  You’re willing your body to push on through the discomfort.  

It’s a character builder.  

The addition of the dual-action arms works the upper body using a push and pull motion.  

This adds to the overall training effect.  

With air bikes, the resistance felt is proportionate to the intensity of the effort.

As effort increases, so does the air resistance.  😯

Pedal at higher intensity efforts and holding that intensity for time is a first-class way to trash yourself.

1-minute ride for max calories is a perfect example.


5-Mile Ride Instructions…

The instructions for the 5-mile ride are simple:  ride 5 miles as quickly as possible.

Record your time so you can monitor progress and identify the time to beat for the next ride.  

Tracking your numbers will give you massive fuel for future attempts.

Make sure you remember to record your time.  Each personal best time serves as the target for the next attempt.  

Constantly attacking your personal best is a great way to gauge improvements with conditioning. 

Here’s a cinema-quality video of the closing seconds of a 5-mile effort…


Finding the data…

Over the years, I’ve been unable to find a log of best 5-mile air bike times on the internet.  I’ve seen private gyms and colleges post times, but not the general public.

I’ve come across plenty of recorded times using the large fan Schwinn Airdyne, but fewer using modern air bikes like the Assault Bike.  

The Schwinn Airdyne has been on the market for 20+ years so naturally there will be more data for the bike. 

I was able to locate several clips of 5 -mile rides on YouTube, but watching someone ride a bike for 12 minutes is boring, not to mention no quality control to verify methods.  

I’m looking for is visual proof of finishing time.  


Strategies to crush the 5-Mile Ride…

Your best 5-mile time will depend on the following:

  •  Increase in fitness levels (strength, power, endurance, etc)
  •  Willingness to be uncomfortable for an extended period of time (grit).
  •  Pacing

Unlike a lot of popular air bike workouts, the 5-mile ride requires a bit of strategy.

Don’t sprint too early.  Come out of the gates too hard, you’ll hit the wall and have nothing left to give as you near the end.  I’ve done this plenty of times.  

Don’t save it all for the end.  Conserve energy for too long and valuable seconds are lost which might not be able to recover at later stages of the ride.

Pace yourself with RPM’s and heart rate.  Monitor your heart rate (beats per minute) and pay attention to RPM’s.  Both are tracked on the computer monitor.  

Avoid obsessing over how far you’ve ridden.  You’ll always think you’re farther than you actually are and wish you were farther.  Settle into a challenging RPM range, focus on breathing and stay there.  No need to keep glancing at the monitor when only 15 seconds have passed since you last checked. 

Use your arms.  The arms play an important part in finishing faster.  You must get your arms involved to take on the stress.  

Push and pull, push, and pull.

Lift your legs.  The deadweight of the non-working leg makes it harder for the working leg and arm.  Actively lift the non-working leg on each revolution, otherwise, you’re moving deadweight with the working leg.

Posture.  Keep the chest tall and the butt planted firmly on the seat.  Do not stand up, that is cheating.  Keeping the chest tall will keep the airways open, versus hunching like a turtle and trying to breathe all coiled up.

What’s a good finishing time?

12 minutes or less is a great time.

Here are the closing seconds of my most recent attempt:


Finishing closer to 11 minutes is aggressive.  

A sub-11 minute ride can be done, no doubt about it.  However, as you become more fit, it becomes more difficult to shave seconds off the finishing time.

My best time is 11:07, verified with picture proof Instagram.

screen-shot-2017-01-03-at-9-04-00-pm

I need your help compiling the data…

After completing the 5-mile ride, stop back and leave your time in the comments section.

Snap a picture of the computer monitor like you see above.  

We need proof.  No cheaters.

Read more about fitness and workouts:

Bodyweight Training Programs

Motion

Intelligently designed bodyweight strength and conditioning programs can turn a beginner into an absolute machine with little to no previous workout experience.  The same programs can humble the elite who have a perception that bodyweight exercise has relevance to their situation.

I’ll come clean.  It wasn’t that long ago that I believed bodyweight exercise could have zero impact to my own training.  I’ve been designing my workouts for the last 10+ years or so, and I was completely wrong.  It’s easy to evolve to have tunnel vision with fitness.  You get used to doing things a certain way, and you discard anything that doesn’t parallel “that way”.

It’s why I support all forms of fitness and do my best to avoid being a zealot.

Bodyweight training, similar to more traditional externally loaded resistance training (barbells, dumbbells, kettlebells, etc) is all about leveraging the principles of progression.

If you stay disciplined to practicing the progressions, you’ll make incredible gains in a short amount of time.

From my experience, the most profound improvements can be made by adjusting any one (or several at once) of the following training variables:

  • Time under tension
  • Movement complexity
  • Stable transition to unstable (example: using 1 arm or 1 leg instead of 2 arms or 2 legs)
  • Increase reps, sets, rounds
  • Decrease rest periods
  • Single plane exercises into multi-plane exercises
  • Rotation

Coaches who are designing the best programs know that leveraging continuous exercise progression is the key to getting client’s the results they want.

I say again:  smart progression and the willingness to continue to go outside of your comfort zone is what gets results.

While I feel that my own program design is solid, I do borrow ideas from programs and other coaches.  Borrow and tweak, but always give credit where credit it due.  That’s my philosophy.

So here we go.  Below are some timeless programs, and also some of the hottest bodyweight-only training programs on the market today.

The best part?  Once you have the program you’re good to go… no equipment necessary.

The Naked Warrior (Pavel Psatsouline/DragonDoor paperback)

screen-shot-2016-10-15-at-9-50-17-am

The Naked Warrior was my first exposure to next level bodyweight strength training.  It changed the way I viewed strength forever.  After adding a healthy dose of pistols, dive-bombers and 1-arm push-up progressions to my training regimen, I had never been stronger.

Pavel Psatsouline is the godfather of modern-day kettlebell training, but he is also an accomplished military and sport performance instructor.  He can be credited for making advanced bodyweight training mainstream and also for sparking the kettlebell revolution in the Western Hemisphere.


TacFit Commando (Scott Sonnon/RMAX)

screen-shot-2016-10-15-at-10-32-41-am

The design of my personal bodyweight workouts involve a ton of exercise variations cherry-picked from Scott Sonnon’s TacFit Commando training system.

TacFit acknowledges the need for improving ROTATIONAL performance and addresses it with a lot of really unique drills.  Rotation is rarely addressed by the fitness industry and often under-developed in a lot of people.  Building rotational power and the ability to resist rotational forces is important for athletic endeavors and the demands of everyday life.

Improving rotational power can be a game-changer for weekend warriors, particularly those who enjoy playing golf, tennis, hockey or softball.

TacFit training systems are a melting pot of many training methods, which Scott collected and organized into a comprehensive program.

The attention to detail extends beyond smart exercise progression and into tactics for recovering from exertion and joint mobility, which again, is rarely discussed in most training programs.  Doing the work at a high level is one thing, but more important is the ability to recover as quickly as possible from work bout to work bout.

TacFit addresses these lesser known concepts brilliantly.

Scott Sonnon is an accomplished martial arts athlete turned military and sports performance coach.  He specializes in training the tactical sector (firefighters, law enforcement, military special forces, etc).


C-Mass (Paul Wade/DragonDoor e-book)

screen-shot-2016-10-15-at-9-53-59-am

C-Mass is a bodyweight program for those who are interested in building a physique using nothing but the weight of their body.  The exercise progressions in C-Mass are not for the faint of heart, but anyone who’s pursued building muscle aggressively knows that uncommon result require uncommon efforts.

I highly recommend this book for those interested in taking their training to the next level, all without touching a weight.


Pushing the Limits! (Al Kavadlo/DragonDoor e-book)

screen-shot-2016-10-15-at-9-56-16-am

Just like Pavel Psatsouline is the godfather of kettelbells, Al Kavadlo can be pegged as the modern-day guru of bodyweight training.

Where Paul Wade’s C-Mass may be more appropriate for the advanced trainee, “Pushing the Limits” is packed full of exercise progressions to serve anyone.  Personally, I’ve beat on Al’s 1-arm push up progressions to improve my pressing strength (and as a byproduct my core stability) well beyond what I thought was possible.

Whether you’re looking for clever bodyweight exercises to add to your current iron regimen or a guide to move you passed road that “The Naked Warrior” paved, this book is for you.


Street Workout (Al Kavadlo and Danny Kavadlo/DragonDoor e-book)

screen-shot-2016-10-15-at-9-57-43-am

“Street Workout is an incredibly comprehensive collection of calisthenics concepts, exercises and programs.”

I’d consider this an equally comprehensive resource as TacFit, with unique bodyweight variations, tips and pearls for building to the next level.

Al and Danny are world-class calisthenic coaches that share a ton of tips and techniques in this book. You’ll be busy for some time with this one.

No matter…

…what methods you’re currently leveraging for workouts, it is important to know that you always have options.

Bodyweight strength and conditioning is a tool in your training tool bag.  Use it when needed, inject some difficult bodyweight exercises into your workouts, use them as a baseline for improvement.

Where can you progress?  What should you regress and tweak to make the next jump?

Establishing an awareness of training options will keep your workouts fresh while avoiding that common cluelessness that many people have when the training space isn’t big enough, time is limited or equipment isn’t what they are accustomed to.

Bodyweight training is adaptive training, but it is also human performance enhancement training in its rawest form.

Bodyweight training strategies are an ace up your sleeve, always.  Play it whenever you need to, and be confident that the workout is going to be HIGHLY EFFECTIVE.


Kyle


Ass Kicking 250-Meter Rowing Workouts

Motion
screen-shot-2016-10-09-at-3-46-46-pm

Photo Credit:  Amazon.com

The rowing machine (aka rowing ergometer or “erg”) is an awesome piece of cardio equipment, and the 250-meter interval is a perfect distance for high-intensity interval training.

Why 250-meters?

Isn’t it too short?  Absolutely… not.  Performed for one rep, yes, it’s too short to get any significant benefit. Spread across 8+ rounds, the training effect is just right.

Repeated effort interval training works extremely well when rowing distances shorter than 500-meters.

It will take most people 40-50 seconds to row 250 meters.  45-50 seconds of high-intensity effort is a long time to be working at end range intensity. 

Smart interval training workouts can and should make you tired, but progressively.   

Interval based training is a great method to reinforce active rest period management.  You exert, then you calm yourself down as quickly as possible before the next round of exertion.  This method has great carryover to real world activities.

The 250-meter distance is overshadowed by other benchmark distances, notably the 500m, 1000m and the distance all nightmares of made of, 2000m.

The 250-meter is a perfect distance to row on its own, or as part of a circuit.  Adding exercises to the row increases the amount of work performed, which increases the training effect.

If you choose to row 250 meters without adding on other exercises (which is perfectly fine),  I recommend pulling at your maximum watt and stroke rate threshold.  I don’t see a reason not too, as the distance is short enough to sprint.  

Especially if you’re resting in between each effort, might as well leave it all on the rower.

Rowing is another zero-impact activity with high reward. Very similar to the airbike.  An excessive amount of impact can wreak havoc on a person’s joints over time.  Being able to induce such a potent training effect while sparing the joints is a major benefit of rowing.

Blazing the meters demands a total body effort, making rowing an ideal piece of cardio equipment for fat loss.  

The ideal situation for fat loss: a lot of muscles exerting together with limited rest and oxygen debt.  

Discipline with diet is the best method.

For those with internally rotated shoulders and an overworked chest excessive pressing, rowing can serve as a counter-balance since each stroke has an emphasis on upper body pulling.

Enough chit-chat.  The purpose of this article is to share three different 250m row workouts, traditional and non-traditional.  

Here they are… 

Row Workout #1: 250-meter interval

250-meter repeats 

  • Complete 8-12 rounds
  • Rest for 1:1 (work to rest) or a flat 60 seconds before starting the next interval

Using the 1:1 work to rest ratio, a 45-second effort gets you 45 seconds of rest.  Adjust the rest periods as needed.  Fatigue will creep up quickly as you progress through the rounds.

This workout can be a brilliant cardio finisher to a resistance training workout.

It may be best to row on days where pulling or grip heavy exercises are NOT part of the program to allow the hands and back a chance to rest.  

A 10 round workout will take about 15 minutes.

Workout #2:  Bodyweight Exercise + 250-meter Row 

15 Push Ups

15 Bodyweight Squats or 6 R/L Alternating Assisted Pistol Squats

250-meter row

  • Repeat for 8-10 rounds
  • Rest 60 seconds (advanced) or 75 seconds 

Here I am working this circuit… 

Integrating bodyweight exercises with rowing is a great way to mix up the session.  Remember, more muscles stimulated and more work being done equates to a higher training effect.  Remember, more muscles working equals a larger training effect. 

Depending on fitness level, the reps for push-ups and squats can be down.

If 15 push-ups are too easy, add weight in the form of a weight vest, sandbag or weight plate.  If you don’t have access to equipment, use single arm push-ups.  Switch bodyweight squats in favor of weighted

If 15 squats is a piece of cake, load up the squats with weight (sandbag, barbell, kettlebell or dumbells) or use a more advanced bodyweight progression like pistol squats.

Workout #3:  250-meters + diminishing rest periods

Interval #1:  Row 250-meters, rest 60 seconds

Interval #2:  Row 250-meters, rest 55 seconds

Interval #3:  Row 250-meters, rest 50 seconds

Interval #4:  Row 250-meters, rest 45 seconds

Interval #5:  Row 250-meters, rest 40 seconds

  • Repeat workout for 2 full rounds (10 total intervals)

A rower is a great investment.  Basic upkeep could make a rowing machine last a lifetime, no different than a car really.  There are many 15-20-year-old rowers still getting frequent use. you’ve been on the fence about the purchase due to cost, I encourage you to take the plunge.  They are worth every penny.

Amazon Prime members, the Concept2 Model D with PM5 (performance monitor 5) is $945 with free 2-day shipping.  

screen-shot-2016-10-09-at-3-51-47-pm

If you have any questions about the Concept2 Model D w/ PM5, message me privately and I can share my experience as a rowing machine owner.

Most importantly, give these workouts a shot and let me know what you think…

Cheers, 

Kyle 

The Swinging Plank

Quick Tips

The Swinging Plank is a brilliant hybrid exercise designed by Scott Sonnon, founder of TacFit training systems.

The movement will put your upper body strength, endurance and multi-planar core strength and stability to the test.

If you’re looking for a non-traditional movement challenge, this is it!

Swing Planks will burn out your core and arms even at lower rep ranges.

For the last several months, I have beaten on this exercise (and it’s variations) aggressively.  

Bodyweight movements like this will get you functionally strong in a hurry without adding bulk, which is great for someone who want’s to function the way they look.

Bodyweight control…

Those of you who’ve been loyal to traditional forms of resistance training will find ground-based bodyweight exercise to be an incredible supplement workouts.

The swinging plank embodies current fitness trends: the shift away from structured exercise and into exploring integrated movement training.

And its not that traditional exercise is bad, it’s not, it has its place and will always have it’s place.  The idea is that at some point, the body and mind crave freedom of movement, beyond what adding more weight, reps, sets can offer us.

Patterns like high and low crawling, narrow surface balancing and hanging exist.

Ground-based exercises that require full bodyweight support (hands and feet in contact on the ground) are fantastic for building functional strength, or in some cases where injury is present, a gentle re-introduction to loading.

By movement design, the swinging plank elicits a minimal amount of stress to the lower body, making it ideal for non-competing circuits or training days where the lower body needs a break from exertion.

However, execution of the exercise will require adequate mobility in the hips, knees and ankles, so if you’re extremely restricted, free up those joints first.  One look at this drill and you can see that lower body joint mobility is a pre-requisite for proper technique.

A fusion of exercises…

Swing planks are a hybrid exercise.

The static plank, chaturanga, push-up, dive-bomber and crawling all merge to form the swinging plank exercise.

At the midway point of the drill, you’ll find yourself in chaturanga (Four-Limb Staff Pose), one of yoga’s asanas (“postures”).  In chaturanga, the body is gracefully lowered toward to the floor, stopping where the elbows reach 90 degrees and tucked into the ribs, core fully activated.

screen-shot-2016-09-15-at-9-42-10-am

Chaturanga

Pressing back and out of chaturanga feels a lot like a push-up or a dive-bomber.  Dive-bombers are a real shoulder burner when performed strict.  Because the movement is backward and not straight up, it’s hard to relate the stress as being identical to a push-up.

Now, what you came here for…

How to do The Swinging Plank

screen-shot-2016-09-26-at-12-43-01-pm

1. Start with weight on the balls of your feet (knees and hips flexed into a squat position) hands extended out in front of the shoulders with palms placed firmly on the ground, eyes gazing between the hands or slightly in front of the hands.

screen-shot-2016-09-26-at-12-43-20-pm

2.  In a front to back motion, lunge your body forward out in between the hands, keeping the elbows against the rib cage, body rigid and low to the ground.

screen-shot-2016-09-26-at-12-43-35-pm
3.  Rotate the chest and torso over the hands and onto to the opposite side, pressing with the arms and pulling slightly with the legs back into the starting position (#1), now facing the other side.

Here is TacFit Commando creator Scott Sonnon demonstrating the swing plank…

The starting position of the swing plank looks a lot the start position of a bear crawl, except in the swing plank, the shoulders are situated just behind the hands verses over the top of the hands.

screen-shot-2016-09-26-at-12-51-59-pm

Start position of a bear crawl.

I’ve found that using this prone table top position (picture above) is a great way to get hand/foot spacing correct.

Technique tips continued…

Technique-wise, it’s important to force the hips into full extension.  Create a straight line from heels to the crown of the head.

Core should stay “soft” yet active to control body position.  Avoid over-tensioning or you’ll be too stiff to flow through the movement.

*** To avoid hand slippage, place the hands on a surface that gives you a good grip. On the way out and back in, you’re not going to be over the top of your hands like you would be during a push-up. Rubber gym matting, grass, a quality yoga mat with some stickiness or a a grittier surface like concrete all work well.

Swing Plank exercise progression…

If you’re quite not ready for the swing plank or maybe you’re looking for a soft progression to get there, here are some drills to work through (in order from top to bottom):

  • 1. Static Prone Plank (Hold for 40 seconds or longer)
  • 2. Static Lateral Plank (Hold for 30 seconds or longer each side)
  • 3. Rotational Dynamic Plank Variations (see here)
  • 4. Bodyweight Push-Ups (15-20 reps)
  • 5.  Dive-Bombers (eccentric and concentric phases, 8-10 reps)
  • 6.  Piston Planks
  • 7.  SWINGING PLANKS

Not everyone is going to need every exercise progression listed.  

You might be ready to attack swing planks today.  

The exercise regressions allow your body to acclimate to stress progressively.

There’s no need to rush.  Aim to do it right, or quite honestly, don’t do it at all.

Creating and building out from a foundation is critical.

Mobility

Making sure you have adequate active range of motion is essential to moving well.  

During the swing plank, the hip, knee and ankle joints should move freely without restriction, aches or pains.

Controlled throughout the entire range of motion.

The starting position of the swing plank places the ankle, knee and hip joints into a very demanding range of motion.

If you find yourself locked up and struggling to get into position without rounding the lower back, I recommend addressing mobility restrictions first.

MyDailyMobility is a great program to use.

Where do swing planks fit into a workout/program?

Anywhere you want.

I like to mix swing planks into work capacity training sessions as a transition/filler exercise. 

Swing planks fit well in between upper (vertical pressing, push-ups, dive-bombers) and lower body exercises (lunges, squats, deadlifts, kettlebell swings).

A sample sequence:

8-10 minutes continuous of:

1a) Bodyweight Lunge x 6 right/left

2a) TacFit Swing Plank x6 right/left

3a) Bodyweight Chin-Up x6

Using a non-competing exercise format provides an opportunity to focus on movement technique while limiting the fatigue much as possible.

Discussion…

Deconstruct and go slow.

I suggest you break the swing plank down into segments in order to appreciate the movement.  Practice the swing plank in slow motion for fewer reps. Do it right. Pause when you reach extension (chaturanga-like posture). Connect your mind to each muscle and transition.

Be conscious of your hand, foot, torso and head position. Pay attention to your breathing throughout the range of motion. Are you breathing or are you holding your breath? Make sure that your tongue stays relaxed and you’re breathing.

Stay low! You should have a little dirt on your t-shirt when you’re done. 

Maintaining a rigid posture while turning over from side to side will blow up your mid-section. The rotational core stability challenge is potent as you flow through each rep.

When performed as a part of a circuit or for higher reps, the swinging plank elicits a potent cardio training effect, making it a great exercise for metabolic workouts.

Hybrid bodyweight training is highly effective and yet so often overlooked. It’s easy to become infatuated with adding weight to the barbell and racing the clock for reps.

Having full control over your body in many different positions is the ultimate safeguard  against injury (injury mitigation) and a gateway to performance.

Bodyweight training can humble people quickly.  

If you’re interested finding out about more unique bodyweight workouts that incorporate movements like the swinging plank, check out TacFit Commando.

Cheers,

Kyle

Alternatives to Ido Portal Method

Ido Portal
Screen Shot 2017-07-02 at 10.34.09 AM.png

“Coming soon” since 2013…

I’ve been checking the Ido Portal Method website for 7 years hoping the “store” page would populate with a few online products.  

Take my money Ido Portal, take my money.

7 straight years of, “Coming Soon”.

I’m confident saying Ido Portal is not going to write a book or create a digital product.

Ido has mentioned in interviews he doesn’t want to chain his work to the “foreverness” of a book.  

Plus Ido Portal Method training philosophy is constantly evolving and expanding, so he’d likely have to compose a 10,000-page book on movement training, which would receive weekly edits for all eternity. 

Like others who wanted to know more about The Ido Portal Method, I started to compile notes from his old blogs, YouTube videos, and interviews.  The idea was to collect enough information, sort it out and begin piecing together a program for myself.

But at some point, I’d burned out.  

I started researching alternatives.  Something that could bring me close to the Ido Portal Method style of training, without wrecking my bank account (more on that below).

While the Ido Portal Method has brand name recognition (with movement training), I knew there had to be other training systems comparable to, possibly even better.

Initial search results confirmed that there were some amazing alternatives.  

The Bones of Ido Portal Method

Weeks of sorting through older content on Ido’s first blog, YouTube videos, and other media was time-consuming and painful.  

But, it gave me valuable insight into his movement philosophy.  

Deconstructing his training methods, it becomes clear Ido Portal Method is a carefully organized hybrid system.

A collection of many different disciplines and methods:

  •  Ground-Based Conditioning  
  •  Gymnastics
  •  Traditional Resistance Training
  •  Mobility 

Categorizing the main elements provided clarity on what to look for during my alternative program search.

Again, looking through the magnifying glass, one will find elements of gymnastics, locomotion, Yoga, traditional resistance training, dance, Capoeira along with mobility training from Functional Range Conditioning (FRC).

Most of these methods are bodyweight-based.  However, Ido does utilize barbells, dumbbells and other tools to train strength or loaded stretching.

“Expensive Machines, Cheap Bodies”, is a classic theme inside Ido’s camp.

While I disagree with going cold turkey on all gym gadgets, I do understand Ido’s point of view.  People get lured into thinking they need fancy fitness machines to get into shape, build strength, etc.

You don’t.

Equipment manufacturers do not care if you buy their products only to love it when a customer buys a product, only to use it for drying wet laundry.  They have your money, you have clutter.

The potency and power of a simple gym set up can be humbling.  A pair of gymnastics rings, an overhead pull up bar, a space to crawl/roll and a willingness to train hard more than enough to make huge gains.

The Rise of Locomotion

Ido Portal did not invent locomotion, crawling and floor flow sequences.

I know this will be difficult for some people to read, but humans crawl as babies during early development and flow-oriented training has been around for generations.

He can be credited with being one of the first to post locomotion work on YouTube.

Crawling/locomotion, bridging and various “Floreio” elements is a great way to expand workouts away from linear exercises.  It’s easy to see the Capoeira influence.

Locomotion exercises can be progressed similarly to traditional exercises, giving beginners an opportunity to practice regressions while offering advanced trainees some really difficult patterns.

Along the way, isolated locomotion work is fused with other movements to create sequences.

Movement 20XX (a digital program from Vahva Fitness described below) was one of the first programs I found to be teaching a similar ground-based conditioning/locomotion curriculum at a FRACTION OF THE COST.

Newsflash:  Online coaching with Ido Portal Method is expensive as shit.

How do you quantify “expensive as shit”?

Expensive as shit = $1,000-$2,000 for 3 months (3-4 hrs per day, 6 days per week)

2BD9B891-B5DF-4E46-92BA-620C81CE406F

Price tag 6 years ago, best believe it’s higher now. 

It’s unlikely you’ll be coached by Ido Portal himself, but rather one of his students.  Plus, they reserve the right to fire you with zero refund.

People can justify and afford to spend $150 on a program.  Especially one with zero compromises in content and coaching, and likely a superior delivery with stream quality and support.

Across 12 months, that’s $15 per month.  Very doable.  

Spotlighted below are a few training systems worth exploring:

Movement 20XX

Movement 20XX

Movement 20XX is a bodyweight based training system that uses ground-based conditioning exercises and combinations to create pre-planned flows and movement sequences.  

Natural movement training.

Students start out by training movements in isolation, gaining strength, stability and fluidity prior to transitioning into movement sequences, and eventually improvised flow work. 

Movement 20XX blends many different movement disciplines, cherry-picking the best elements from Parkour, Yoga, bodyweight training, etc.

I started working on beginner locomotion years ago.  Doing so changed everything about my movement quality, capacity and confidence.  

It also started a shift in how I viewed the “working out” and fitness.   

The first few weeks of crawling was no joke.  It was humbling and I sucked.  But in time, my body adapted to the demands, graduating from stiff and immobile… to pliable, dynamic and strong.

My early attempts at the lizard crawl were ugly.

It’s a tough pattern.  The body position and range of motion were foreign, and the timing of the hand/foot movements was a challenge to manage.  Getting into the low position was challenging (trademark of the lizard crawl), much less moving anywhere.

I reluctantly swallowed my pride and started training as a true beginner.  The basics of crawling became my daily practice.

With practice, progression and adaptation, the Lizard Crawl became one of my favorite locomotion patterns, and still is to this day.

I experiment with a lot of hybrid variations of the lizard crawl now, along with integrating it into conditioning circuits.  Nothing like sucking wind while crawling 1 inch off the floor.  Whew.

Locomotion exercises are primarily quadrupedal (4 points of contact with arms and legs) and move the body through a natural (yet uncommon) range of motion, reconnecting the upper and lower extremities, challenge the torso muscles, timing, etc.  

I include a variety of crawling patterns in nearly all of my workouts.  

Currently, I use crawling patterns inside of pre-workout warm-ups (daily tune-up) on strength-focused days, as part of work capacity circuits or with bodyweight based flow sessions.  

The bodyweight based flow sessions are fun and equally challenging for the body and mind.  The premise is simple.  I move around a room without a plan for 10, 15, 20+  minutes.  

Here’s an example flow…


A lot of crawling and locomotion patterns I integrated from Ido Portal Method (skimming the blogs and social media) are being taught by Eero Westerberg in Movement20XX, which is why the program made the list as a valid alternative to Ido Portal online coaching.

Movement 20XX was designed to be effective when used remotely, which makes it great for training at home or while traveling.  The program design is progressive and structurally sound.  


Global Bodyweight Training

Screen Shot 2017-12-11 at 6.12.15 AM

Strength is a critical component of becoming a better mover.  

Dare I say… strength might be the most important of them all.

Strength comes in many forms.  Strength doesn’t always have to be associated with bench pressing 3x your bodyweight, deadlifting a truck or heaving a 300lb atlas stone onto a platform.

A full range of motion single arm push up is a demonstration of pure strength.

As I get older, I care less and less about quantifying my performance with numbers (weight on the barbell, etc).

What I do care about, is how my body feels the other 23 hours a day (when I’m not training) and also what I’m able to with my body in both known and unknown situations where I need to be able to perform.

There’s some truth to the old saying, “Nice body, what can you do with it?”

Bodyweight Athlete curriculum introduces and educates people on the power of leveraging bodyweight based strength training.  

When I found Global Bodyweight Training, the first thing I noticed was how closely the curriculum matched what I had designed for myself.  It was nearly a carbon copy.

I’d recently decided to trim the fat with regard to exercise selection and variation, choosing to pursue higher-level bodyweight patterns like single-arm push-ups, single-leg squat variations, handstand positioned pressing, L-Sits, etc.

Progressive bodyweight training requires plenty of body tension, attention to detail and refinement of technique.

Bodyweight Athlete is a structurally sound training program for anyone interested in experiencing the potency of bodyweight training.  

The best part about bodyweight training is it can be taken ANYWHERE.  

You’re never without an opportunity to workout.

Bodyweight-based patterns included in the curriculum:

  • Muscle Ups
  • Handstand Push-Ups
  • Single Arm Push-Ups
  • Single Arm Body Rows
  • Pistol Squats
  • Handstands
  • L-Sits
  • Human Flag 
  • Back Levers

The exercise progressions listed can be scaled for any level fitness, from beginner or elite level movers.


Carefully selected exercises and well-timed progression of those exercises are extremely powerful.

The human body is an adaptation machine.  In order to continue making progress, you’ve got to increase the challenge somewhere.  Increasing the challenge can mean adding load, complexity, volume, time under tension, etc.

Quality programs are designed to condition the body progressively and safely.  You want to boost performance while limiting the chance of injury during training.

Regarding injuries, always remember there is life outside of the gym.  If you’re destroying your body while working out, life is going suck.  Dealing with daily aches and pains, dysfunction and injury is no way to live.

Keep the needle moving… safely.  Your gym work should enhance your life, not take away from it.

Bodyweight Athlete emphasizes joint mobility work, core conditioning, self-myofascial release, and breathwork.  These are lesser-known elements (yet important) of a comprehensive approach to building a body.  

It’s easy to become fixated on the sexy part of the program… the exercises.

Building a high performing body is a multi-faceted approach.

Mobility, establishing and expanding your useable range of motion, is CRITICAL.

I’ll go ahead and say mobility training IS strength training.

Keeping joints buttery and strong contributes to adding useable strength to your frame and also avoiding doctor’s visits for preventable joint conditions later in life.  

Core training.  Lots of people have gone deaf to the importance of training the core.  It’s hard to pinpoint exactly why, but I think it could be because people are wasting their time with most core-focused exercises.  

In fitness, the pendulum always seems to swing too far in one direction (with concepts, machines, techniques, etc) and people get hyper-focused on things for a little while before the novelty eventually fades.

I think this is sort of what happened with core training.

Just like low load/high volume bodyweight exercises (1000 bodyweight squat workouts) do very little for increasing raw strength, limited range of motion crunches and sloppy toe-to-bar work also do little to contribute to developing a functional core.  

(Oh. My. God.  He said “functional”.  Send me a better word and I’ll edit it out)

Take a single arm push up.  If your mid-section is weak, you’ll know within the first 6 inches of the descent.  Low back with fold, ribs will flare, compensatory movement becomes the default operating system.

Approach your core training like you’d approach building other patterns (squat, deadlift, pulling, pushing, etc) and you’ll be pleasantly surprised.

Core conditioning still matters.

Check out Global Bodyweight Training

Strength and Movement Training

Everyone will read and digest this article differently (seeing value or maybe not seeing as much value) and I understand that we all have different financial budgets for investing in programs.  

That being said, I do believe that combining the strength work from The Bodyweight Athlete with the ground-based conditioning elements (crawling, locomotion, etc) taught in Movement20XX is an extremely powerful approach to take.  

You’re getting the best of both worlds.  Strength and natural movement training.

Train elements from each in the same workout, or, alternate every workout.

I’ve used both approaches and found each to be equally effective and enjoyable.

Either way, you’re going to make great progress.

Follow a system

Find a training system and follow it.

I’ve provided a few options for you to look into, please do.

Skipping around from program to program, using bits and pieces of various techniques doesn’t deliver the same results when compared to digging in and following every detail from a full training system.  

Building fitness and movement capacity is a multi-faceted endeavor.  

There’s plenty to consider and monitor. 

Strength, mobility, movement training, traditional resistance training all play a significant role in creating a strong, well-conditioned, injury resistant, dynamic body.

It’s a lot to think about, it’s not easy, but in time you’ll begin to gain an understanding of how to building a body.  The path to improvement should be simple, not complex.

Avoid the minutiae of complex training systems.  Both of the programs above are structured with clear communication, free of B.S. and straight to the point.

Keep it simple.  Work hard, stay consistent, bust your ass when you’re training and remember to give your body rest when necessary.

The best advice I can offer is to limit the “paralysis by analysis” and exhaustive research.

Yes, do your own homework and self-educate, observe which programs are worth trying out, but ultimately remember to settle on 1 or 2 get into the gym to do the work.

Nobody ever  “thought” themselves into a better moving body with less body fat.

At some point, you must get your hands dirty and move, even if you’re god awful.  If you’re new to this stuff, lord knows, you might be god awful.

Keep at it and your body will begin to adapt.  You’ll move with improved grace, balance, strength, and confidence.

In the beginning, nobody knows what the hell they are doing.  Not Ido Portal, not me, no one.

096DE450-8242-4982-AF49-20013929D2D0

If you’d like to see what I’m up to, check the Meauxtion YouTube channel or Instagram to see what my daily training looks like from a home gym. 


Cheers to your success,

Kyle

3 Jump Rope and Kettlebell Workouts To Try

Workouts

Depending on your training level, pairing kettlebell drills like swings and jumping rope can provide an incredible training stimulus.

All three of the workouts below will require a kettlebell and a jump rope.

The effectiveness of the workouts will depend on you, your effort, training familiarity with the exercises, kettlebells and jump rope.  Jumping rope can be a limiting factor for a lot of people, but with practice, you’ll quickly improve.

Step #1: Choose a kettlebell weight that is challenging to swing for 15 repetitions (we’ll be swinging it for 10 repetitions in the workouts).

Step #2: Select a jump rope that turns effortlessly and has a length appropriate to your height.  Generally speaking, when you place one foot on the rope you should be able to pull the handles to your armpit region.

Selecting only two pieces of equipment minimizes decision fatigue.  Less can be more.

Baseline workout:

10 Kettlebell Swings

1 minute Jump Rope

  • 10 continuous rounds without rest between swinging and jumping.
  • Two movements performed savagely well.


Intermediate workout:

10 Kettlebell Swings

10 Kettlebell Goblet Squats

1 minute Jump Rope

  • 10 continuous rounds without rest between swinging, squatting and jumping.
  • Addition of the squat pattern element to the baseline workout above.


Advanced workout:

10 Kettlebell Swings

10 Kettlebell Goblet Squats

5 Right/Left Arm Kettlebell Overhead Press

1 Minute Jump Rope

  • 10 continuous rounds without rest between swinging, squatting, pressing and jumping.
  • Now it’s a party.  A full-body training session of hip hinging (swings), squatting (goblet squats), vertical pressing (overhead press) with jumping rope serving as the active rest between these loaded movements.


One easy way to make any of these workouts more challenging is to complete more rounds in the given timeframe.  

In other words, work faster.  Be mindful of exercise technique of course.

Less is more.  

The impact of a simple workout like this is tremendous, and I often recommend breaking the monotony of traditional cardio training with sessions like this.

Incorporating big bang major movement patterns like kettlebell swings will serve you amazingly well.

Enjoy these workouts and feel free to progress them beyond what I’ve suggested to further challenge/customize to suit your needs.


Kyle


Similar posts:


Nano-Cardio: Hybrid Row Workouts

Quick Tips

“Nano-cardio workouts” are a multi-dimensional approach to traditional conditioning methods.

In other words, instead of only rowing or running or biking as your cardio vehicle,  I’ve assembled several exercises together to create a more manageable compact conditioning circuit.

Traditional cardio bores me.  I used to think it was a lack of discipline making me feel this way , now I realize it’s just preference.  Leave me the choice of running for 20 minutes, or working through one of the workouts below, and I am taking the hybrid cardio session every single time.

Mixing and matching several different exercise patterns together keeps workouts interesting and more productive.

So where do these workouts fit in the grand scheme of things?  I suppose the appropriate answer to this question is dependent on your current fitness level, but my advice would be to slip them in before or after strength-centric focused days.

Nano-style cardio circuits frequently leverage sub-maximal movements.

Ballistic drills like kettlebell swings are purposely kept to low rep ranges and more traditional resistance exercises are typically left to bodyweight load or band-assisted if need be.

I want you to feel better, improved when you’re finished, not feeling burn out, drained and moody.  There is a time and place for burn-out style training sessions and it’s not every single day.  It’s possible to feel tired yet better.  Extreme fatigue is not the goal.

Why is extreme fatigue not the goal? I want you to build your conditioning gradually, intelligently.  Smarter, manageable training spread across the long-term.  It is, in fact, a marathon not a sprint.

Give high a energy effort while you’re knee deep in these sessions.

Train hard, recover harder and set yourself up to build and progress from the today’s effort.

Now, please enjoy these three options.

Nano-Cardio #1

15 Kettlebell Swings

250 Meter Row

  • 8-10 rounds
  • 45-60 seconds rest in between rounds (or use heart rate monitor and recover to 60% of max heart rate before starting next round)
  • Rower damper setting to 5-6


Nano-Cardio #2

10 Squat-to-Press

5 Chin-Ups

250 Meter Row

  • 8 rounds
  • 45 seconds rest for rounds 1-4, 60 seconds rest for rounds 5-8
  • Rower damper setting to 5-6
  • Squat-to-Press:  Use barbell, kettlebells, dumbells, sandbag or whatever you have.


Nano-Cardio #3

10 Kettlebell Swings

5 Right/Left Landmine Rotation Grapplers

250 Meter Row

  • 8 rounds
  • 45 seconds rest for rounds 1-4, 60 seconds rest for rounds 5-8
  • Rower damper setting to 5-6
  • Manageable weight on the landmine grapplers, progress up in weight as needed.


Notes:

Notice that all of these compact conditioning workouts include a 250 meter distance rowing interval.  The 500 meter may be a gold-standard distance, but I have found that rowing a 500 meter hard for nano-workouts like these is too aggressive for maintaining output across 8 rounds.  Especially after working through two exercises prior to rowing.

Remember, the workout is scheduled for 8 rounds, don’t make the mistake of measuring effectiveness of the workout based on you feel after the first couple of rounds.  You will be tired eventually.  If you’re fresh as a daisy after battling through 8 rounds, add more, but don’t overdo it.

A 250 meter row delivers a great cardiovascular stimulus without making you feel like you’re spending the entire workout on the rower.

By keeping the rowing distance shorter, you’ll give yourself a chance to increase your power per stroke across that 250 meters.  Shorter distance, less accumulated fatigue, more effort per stroke, more focus on technique per stroke.  This is valuable for all fitness levels.

Fatigue is a technique killer, no matter how you are exercising.

Concept 2 Rowers come equipped with a read-out monitor that gives amazingly detailed feedback on your watts (power output), distance, time and back log for previous workouts.  It’s an amazingly effective piece of fitness equipment.

Increase the distance if you feel that my suggested distance of 250 meters isn’t challenging enough, or you’ve adapted quickly and need to progress.

But again, don’t make that decision until you’ve hit rounds 7 or 8.

I’d guess that the average time it will take to row 250 meters will be between 38-50 seconds.  It’s likely that you will see that time drop off as fatigue sets in during later rounds.

Damper setting: I rarely adjust the damper setting outside of the 5-7 setting.  Adjusting the damper too low doesn’t seem to provide enough resistance early in strokes, yet adjusting it too high turns seems to si training event and makes each stroke feel as if you’re rowing through a mud.  Play around with the damper setting, see what you prefer.

Keep the rest periods strict.  I can’t stress this enough.  Make an effort to pay greater attention to the details.

Too often people aren’t as detailed with their rest periods as they should be.  If you’re scheduled to rest for 45 seconds, that means  you’re resting for 45 seconds. Not 45 seconds plus the 10-15 seconds it takes to set up for the next round.  Your first rep of kettlebell swings should begin when the clock hits 45 seconds (or whatever length rest period you’ve chosen).

Physiology-based rest periods is the next progression beyond the basic pre-set, fixed rest period approach.  If you own a heart rate monitor, I highly recommend leveraging some simple technology for a more customized work:rest experience.

The concept is simple: you’ll start the next round when your heart rate lowers to a targeted beats per minute.  My personal target heart rate is commonly 60%-70% of my maximum heart rate.

Of course, in order to figure out your target heart rate, you’ll need to first estimate (the keyword here is “estimate”) what your maximum heart rate is, so here are some links to formulas…

Estimating heart rate with the infamous 220-age equation is by far fastest, yet probably the most inaccurate.  This formula can leave you with a standard deviation of + or – 12 beats per minute.  For me at 31 years of age, that means that my maximum heart rate could be anywhere from 177bpm-201bpm.  That’s a wide range.

Using a heart rate monitor does provide a more customized workout experience, along with some adding a motivation element.  If you’re like me, it’s interesting to track your heart rate patterns during exertion/rest, time to recover back to target heart rate, and the general adaptations that occur over the long-term.

It’s amazing how the body responds to different training stimuli based on intensity, efficiencies and inefficiencies and duration.

But, keep in mind that recovery from intense bouts of work can vary greatly from person to person and is often highly individualized.

Screen Shot 2015-12-08 at 6.38.28 AM.png

Polar FT7 Heart Rate Monitor

(credit: Amazon.com)

A heart rate monitor with basic functions and read out such as the Polar FT1 Heart Rate Monitor or the Polar FT7 Heart Rate Monitor from Amazon will work fantastic.  Here’s the link to the entire Polar product catalog on Amazon.

If you’re interested in a fitness tracker that provides information well beyond a basic heart rate function, there are plenty of more technologically advanced options.

Screen Shot 2015-12-10 at 8.14.10 AM

(photo: Fitbit Surge Fitness Superwatch)

I would recommend the following (in no particular order):


Give these a workouts a go, check out the heart rate approach to work:rest,  and if you would, leave some feedback in the comments section about your experience.


Cheers,


Kyle


Shop Now Rogue Fitness